Controls
Use the sidebar to move between everyday work, agent configuration, and administration. The available navigation, actions, and data depend on your permissions and the features enabled for your organization.
Left panel
The top of the sidebar provides direct links to Chat, Workspaces, Artifacts, and More. Below them, switch between Work, Build, and Admin. Selecting a tab changes the panel content; it does not change your permissions or enable Admin mode. Unavailable destinations are hidden.
Work
The Work panel adapts to the selected destination. Select More to show Recordings, Connections, and Workflows, where available; select Chat or Workspaces to return to the corresponding list.
- Chat opens the conversation area. Its sidebar context shows conversations, an agent filter, and New Chat.
- Workspaces opens the catalog of project and process spaces. Tasks are inside a workspace's Tasks tab. See Workspaces.
- Artifacts opens the catalog of files available to you from conversations and workspaces.
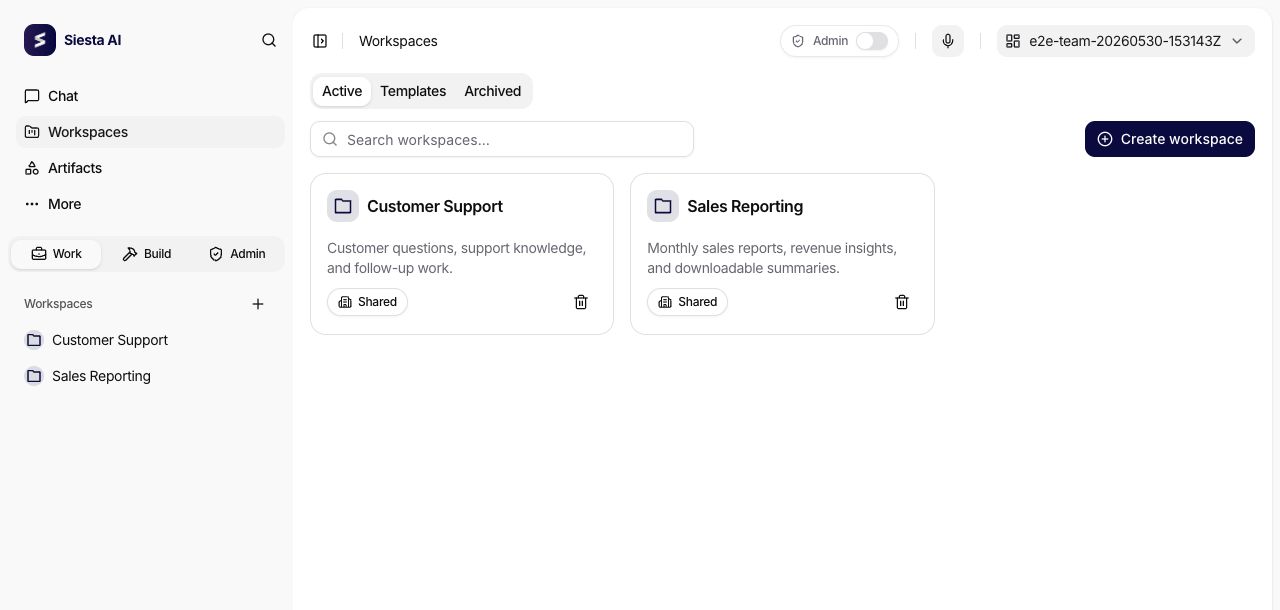
In Workspaces, the sidebar shows workspaces and their conversations. Select a workspace to open its chat, or expand its arrow to browse conversations explicitly belonging to that workspace and available to you. Assigning an agent does not move its earlier conversations there. Expanding a workspace does not change its access policy.
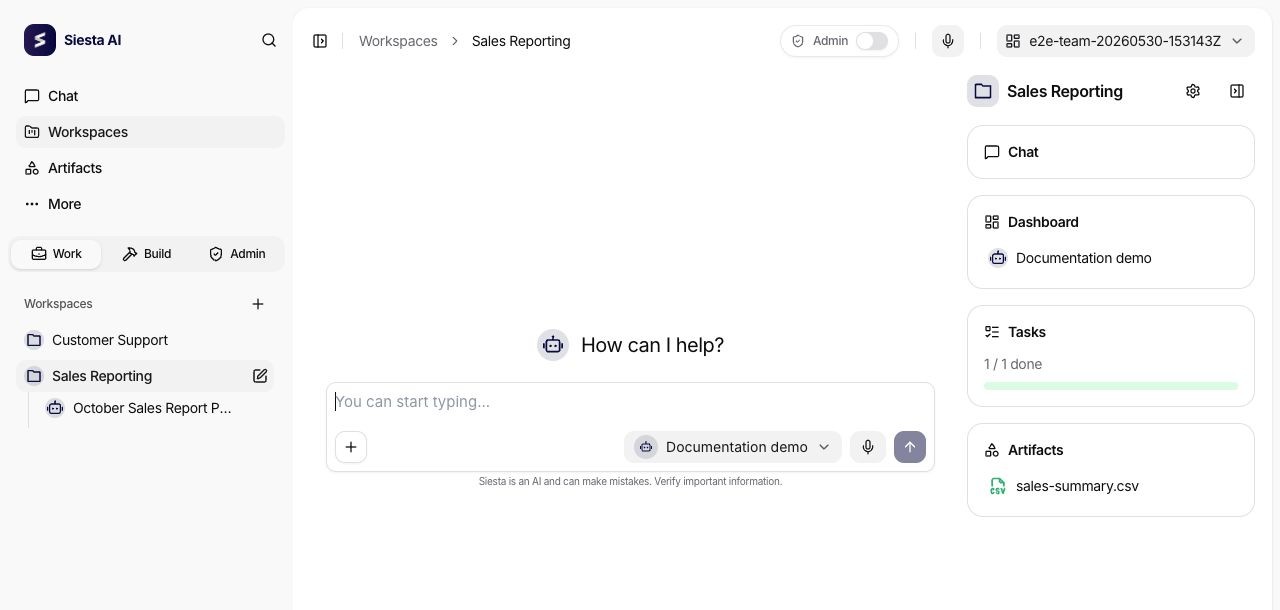
Build
Build groups the resources used to prepare agents and connected processes:
| Group | Destinations |
|---|---|
| Library | Library |
| Execution | Agents, Skills, Workflows |
| Context | Data, Graphs, Memory |
| Connectivity | Connections, Webhooks |
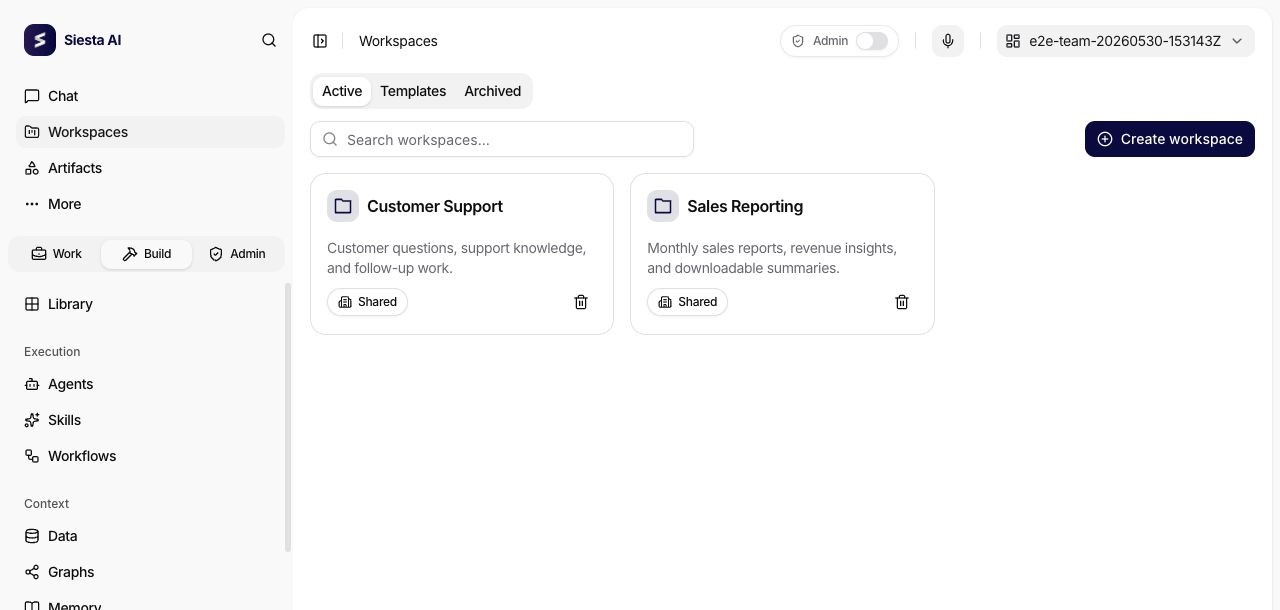
Some destinations, such as Connections and Workflows, are also available through shortcuts in Work. They open the same resources.
Admin
Admin groups available destinations under Settings (Organization, Settings, Security, Limits), Observability (Analytics, Conversations, Logs), and User Management (Users, Teams, Roles). The menu depends on your permissions and organization settings.
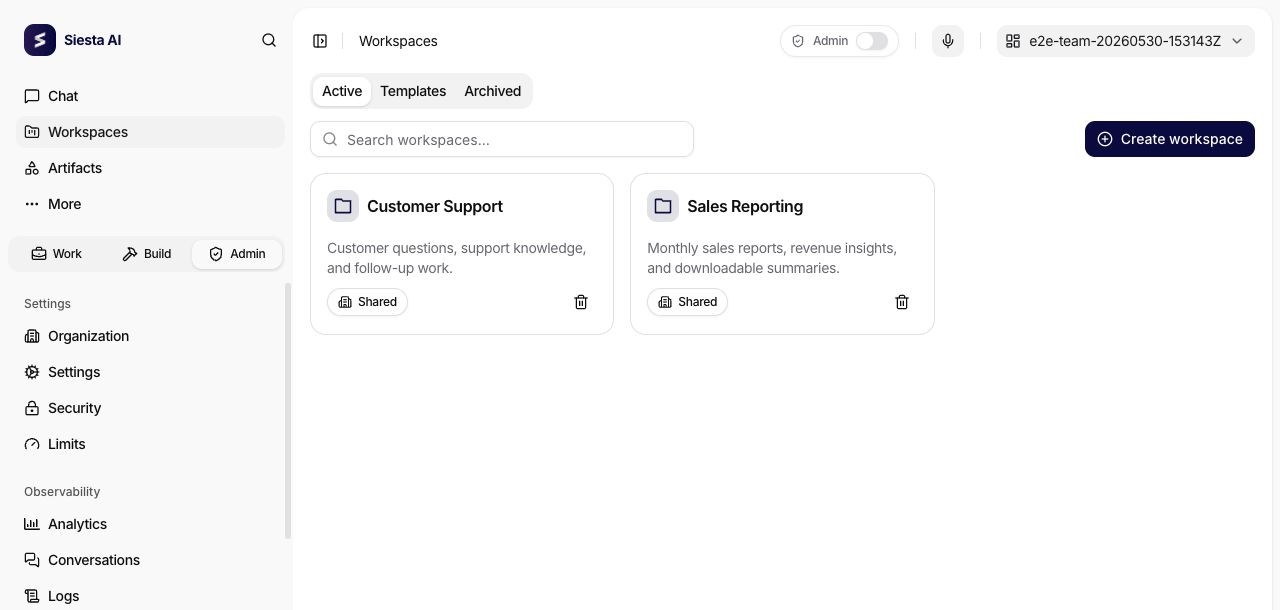
The example shows only the destinations available to that account. A missing menu item may reflect your permissions or organization settings. The separate Admin mode switch, when available to authorized users, controls access mode; the Admin navigation tab does not.
Header and search
Use the sidebar toggle to collapse or reopen the panel. On smaller screens, it opens the navigation drawer. Breadcrumbs in the header show your current location. Depending on your access, the header can also offer favorite-agent shortcuts, a recording action, and the Dashboard team selector.
Select the magnifying glass or press ⌘K on macOS / Ctrl+K on Windows to open global search. The search button sits beside the sidebar logo, or in the header when the sidebar is collapsed or on mobile.
Search across Artifacts, Conversations, Workspaces, and Agents, or choose All. Unavailable categories are disabled. Use the arrow keys to move through results, Enter to open a result, and Esc to close search. Results respect your access.
Result actions
Conversation results use their agent's icon with a conversation marker. Select a result to open it, or use its … menu for available actions:
| Result | Selecting it | Additional actions when permitted |
|---|---|---|
| Agent | Opens a new chat with that agent | Overview, Rename, Delete |
| Workspace | Opens the workspace detail/chat | Overview, Rename, Delete |
| Conversation | Opens the conversation in chat | Rename, Delete |
| Artifact | Opens file preview | No Overview, Rename, or Delete menu in search |
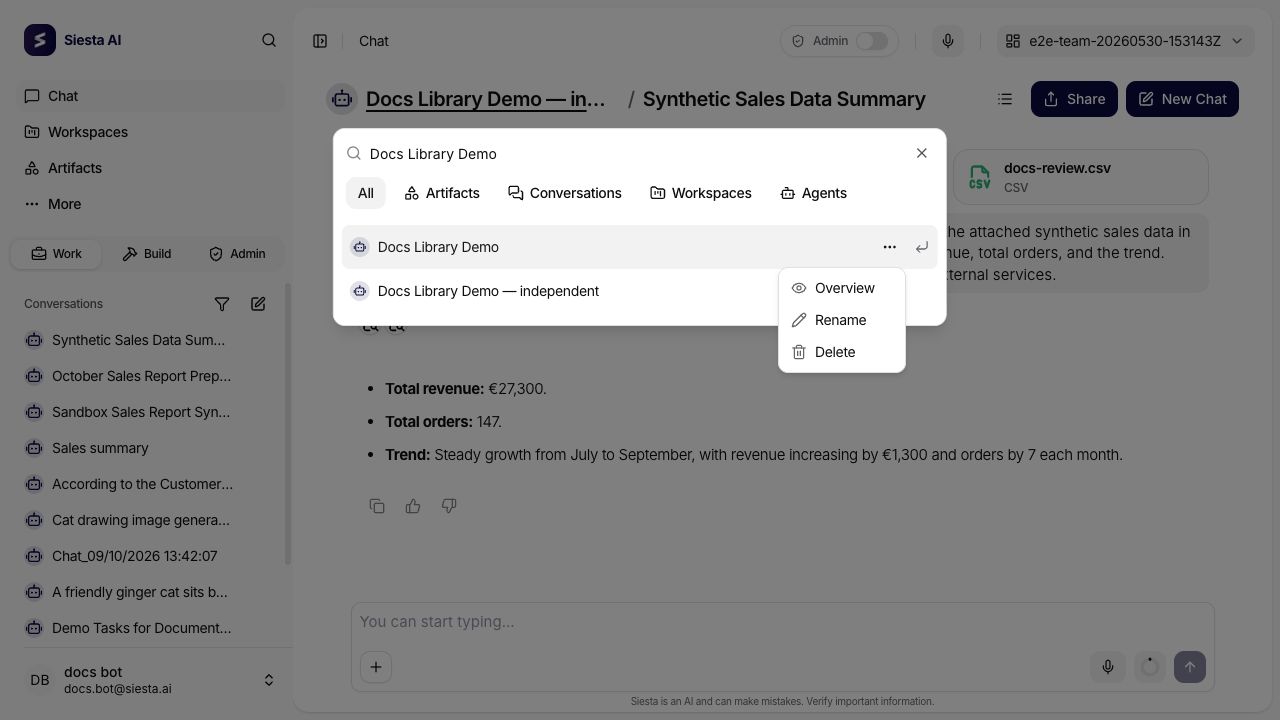
Agent Overview requires the relevant agent-detail permission and write access; workspace Overview follows workspace-view access. Renaming/deleting agents or workspaces also requires the respective action permission and write access. Conversation rename follows chat permission, while deletion requires conversation-delete permission; the backend checks access to the target conversation again. A result being visible does not grant every action.
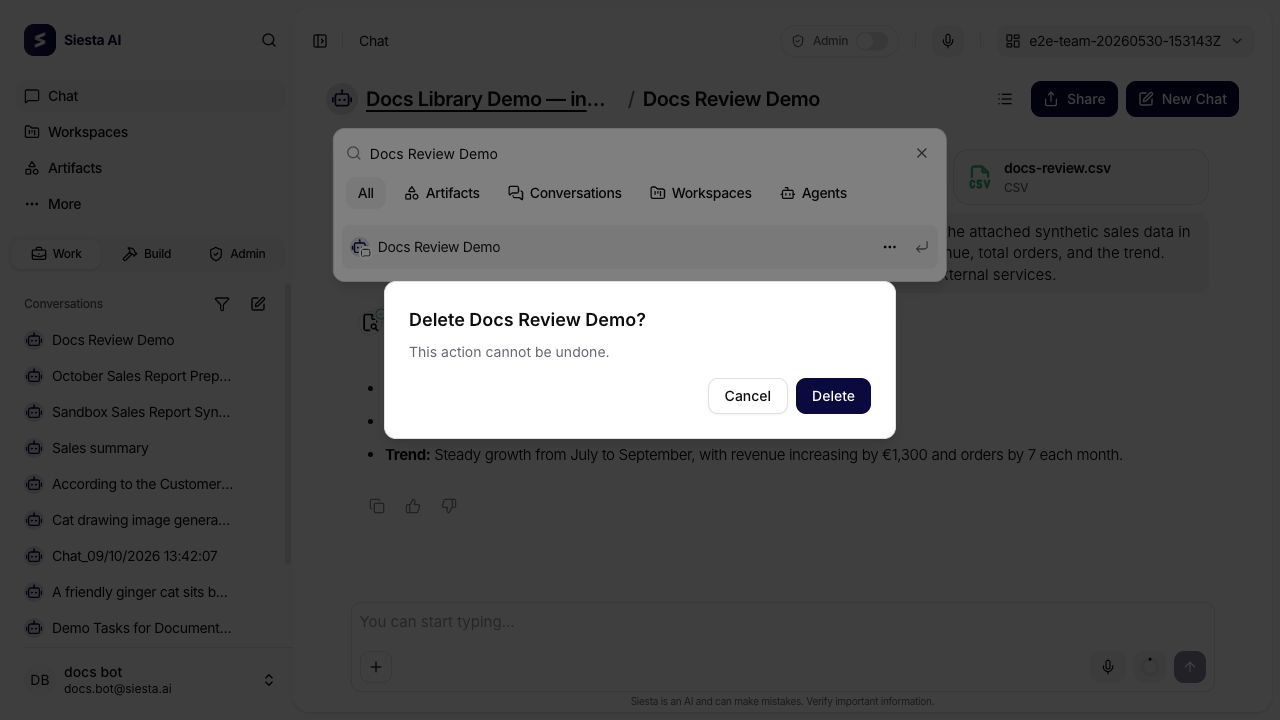
Review the target in the rename or delete dialog. Delete needs confirmation; Cancel closes the dialog without deleting. Protected resources, including a workspace default agent, can reject an action even when its menu is present. If access changed or the record was removed, refresh search and verify the result before retrying.
User menu
Select your user card at the bottom of the sidebar to open your account menu:
- Profile opens your personal settings.
- Dark mode or Light mode changes the appearance.
- The current language, such as English, opens the language submenu.
- Help opens help resources.
- Log out ends your session.

Dashboard
The Dashboard summarizes activity for a selected team. Open it using the dashboard icon beside the team selector in the header, when this control is available to you.
Team selection
Choose a team in the header selector. Selecting a team from another page opens that team's Dashboard. The selection filters Dashboard cards; it does not switch your organization or apply a team filter to the rest of the application.
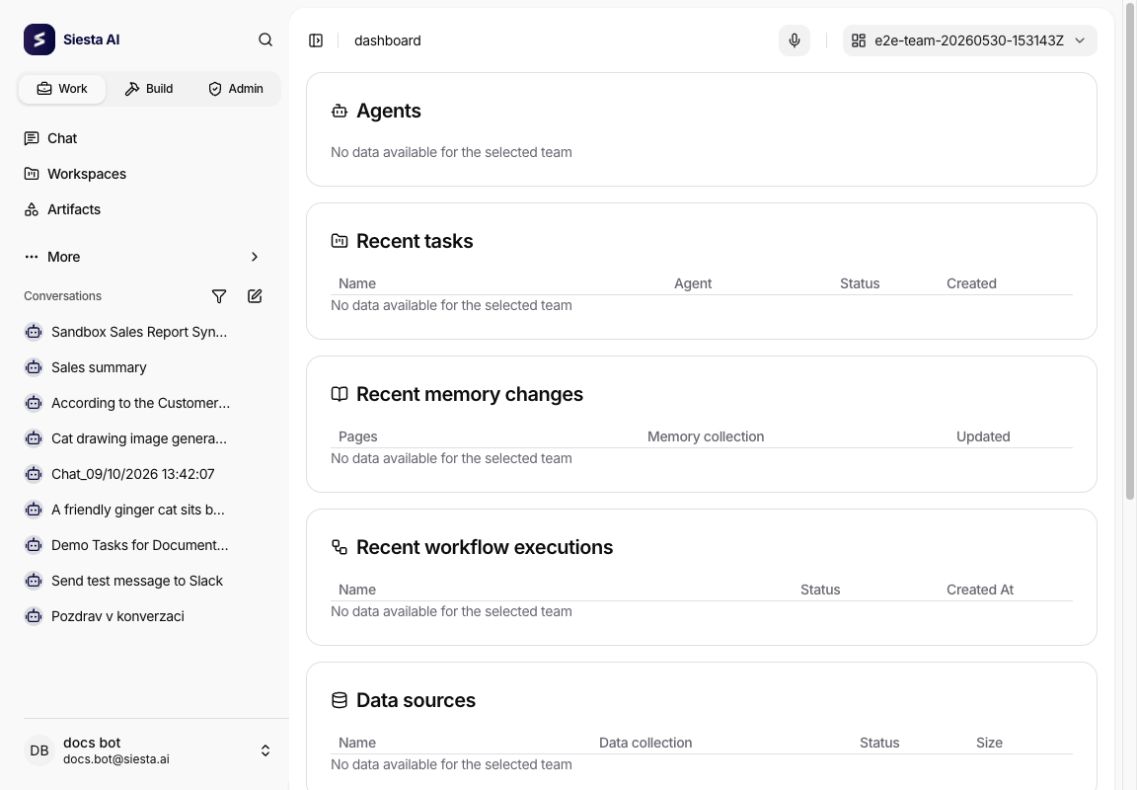
If no teams are available, the Dashboard shows an empty state. A card can also be empty when the selected team has no relevant data.
Overview cards
Dashboard cards cover Agents, Recent tasks, Recent memory changes, Recent workflow executions, Data sources, Recent recordings, Skills, and Connections. Open an item to continue in its relevant section. Available links and actions still depend on your resource permissions.
Access and sharing
The Access control manages who can use or edit a resource, such as a workspace, agent, workflow, or data collection. It may appear inside a form or open a separate access dialog. Without permission to manage access, you may see only its status badge.
- Under Team Access, find and add a team.
- Choose Can Use or Can Edit for that team. Use its remove action to revoke the team grant.
- If Organization permission is available, choose None, Can Use, or Can Edit for organization members.
- Save the access dialog or the containing form to apply the changes. Closing a form's access editor with Done only updates the draft; save the form as well.
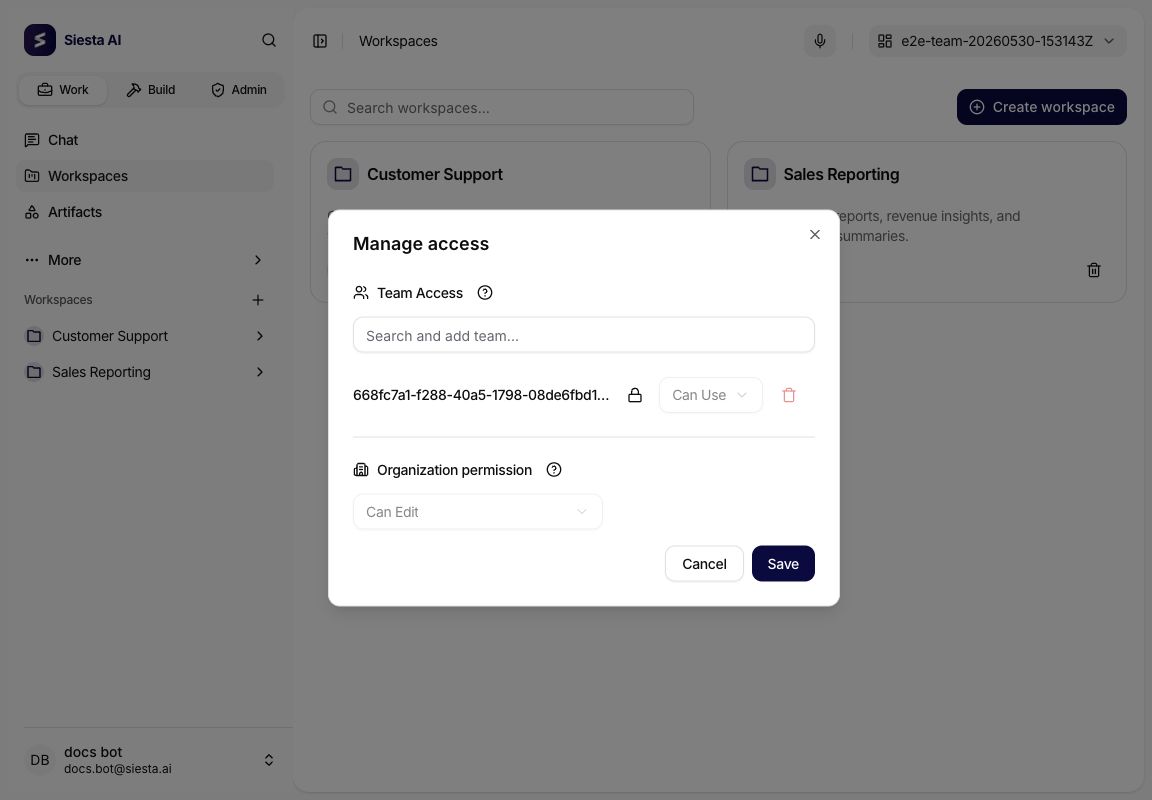
The Private or Shared status reflects the configured grants. With no team or organization grant, the resource is private. The sharing editor grants access through teams and the organization; it does not offer an individual-user picker.
Changing access requires write access and the relevant editing and sharing permissions. Sharing with the entire organization or with teams you do not belong to requires additional authorization. Team grants you cannot manage remain locked. See Roles and permissions for administrator guidance.
Conversation list
In Chat, use the sidebar's Conversations list to return to an existing conversation. Use the filter icon to choose an agent; the new-chat icon starts a new conversation.
Select a conversation title to open it. Status indicators show its current state, and the selected conversation is highlighted. The row menu offers Rename and, when permitted, Delete with confirmation. Scroll down to load more conversations automatically. Workspace lists use an explicit Load more control when more items are available; a loading failure offers Retry.
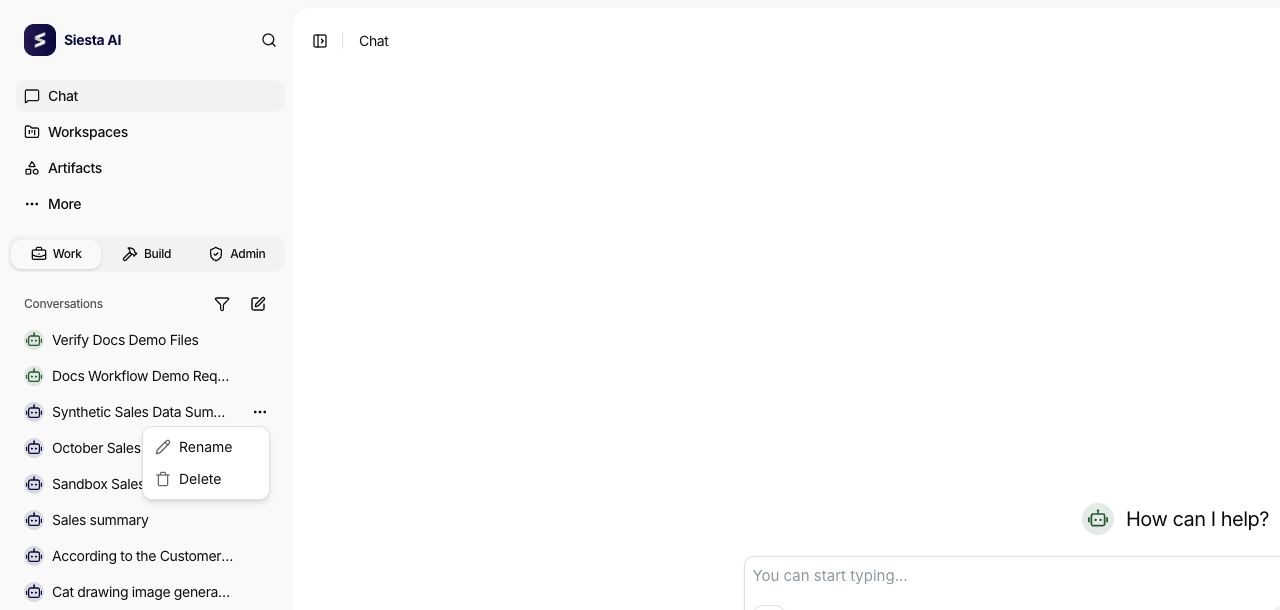
The workspace conversation list is scoped by explicit workspace membership and your access, rather than including every earlier conversation of its assigned agents. Admin → Conversations is a separate review area; see Conversations.
The Share action in an opened conversation manages a conversation link separately from resource Access. Available link-sharing options depend on your permissions and organization policy.
Chat input
In a new chat, choose an agent before attaching files and writing your request. Changing the agent at this stage clears selected attachments. If the agent provides suggested prompts, selecting one fills the draft so you can review or edit it before sending.
| Control | Action |
|---|---|
| + | Select files to attach. You can also drag files into the chat. |
| Agent selector | Choose the agent before starting a new conversation. |
| Microphone | Dictate text into the draft when your browser supports speech recognition. |
| Voice conversation | Start realtime voice when the selected agent supports it. |
| Send arrow | Send the message; Enter also sends, while Shift+Enter inserts a new line. |
| Stop button | Stop generation while the agent is responding. |
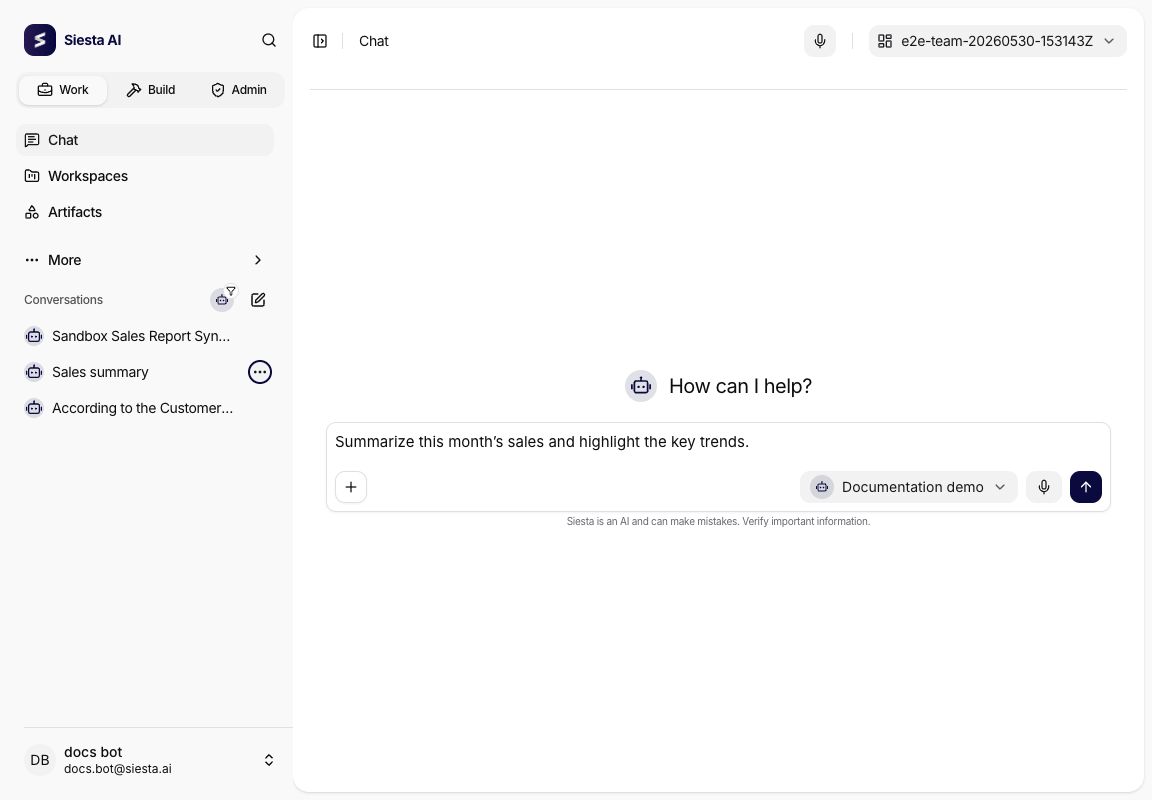
Wait for attachments to finish uploading before sending. Sending may also be unavailable while a tool action needs approval or a realtime voice session is active. In an existing conversation, the usage indicator can show the context window, token breakdown, and applicable usage limits.
See Chat for attachments, generated files, voice conversations, and reviewing agent output.