Data
Data collections organize source material that agents and workflows can use as context. A collection is a logical container; each collection can contain one or more data sources, and each source can contain documents or synced records.
Use Data when you want agents to answer from company files, knowledge bases, documentation exports, project materials, or other structured source content.
Purpose
Each data collection:
- has a name and description,
- groups related sources under one topic or workflow,
- can be connected to agents,
- can contain manual uploads or sources created from integrations,
- gives admins a place to inspect documents, status, and source configuration.
Overview of Data Collections
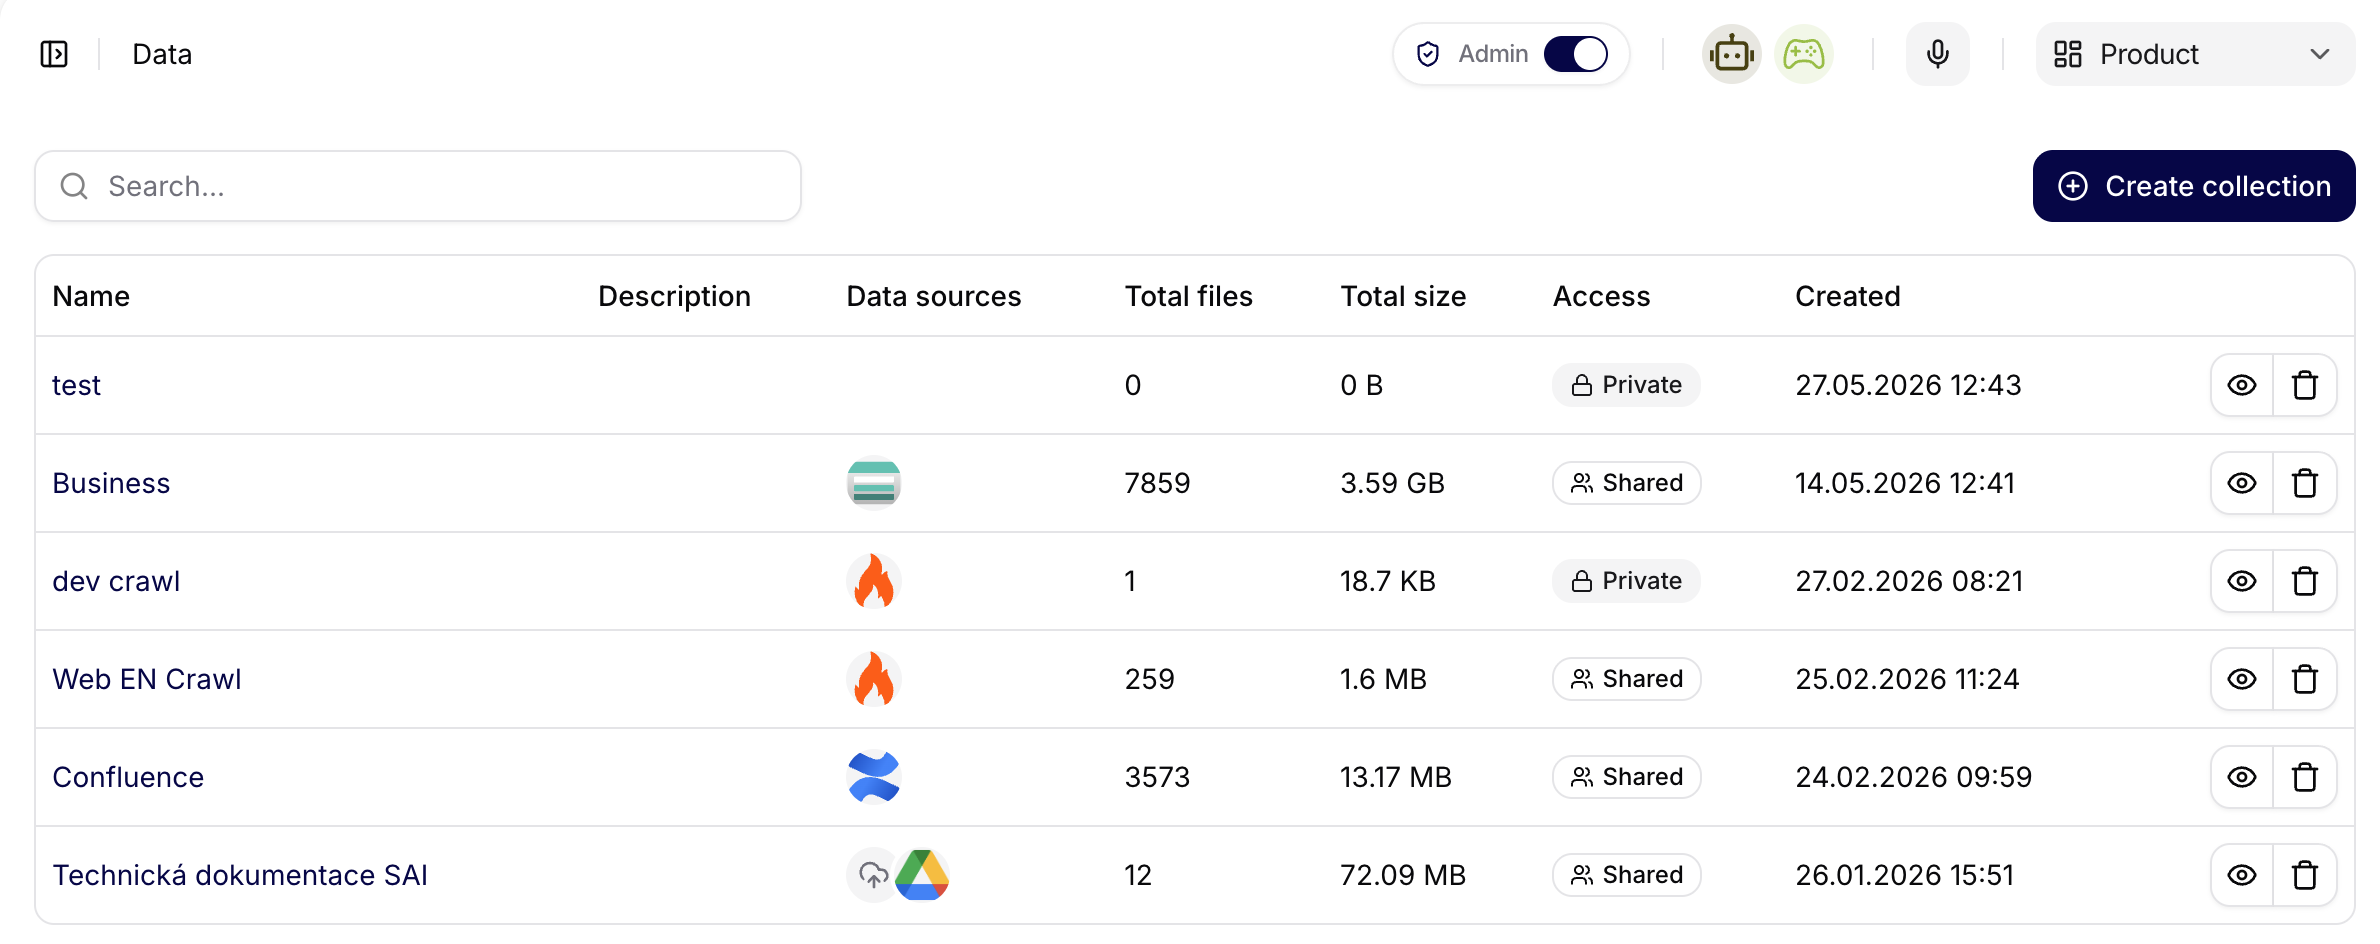
The Data overview shows all created collections in a table.
Typical columns include:
- Name: collection name.
- Description: short explanation of the collection's purpose.
- Data Sources: number of sources in the collection.
- Created: when the collection was created.
- Actions: available actions for the collection.
At the top of the page, use search to find a collection or Create Collection to add a new one.
The screenshot shows the Data overview for the Product team. Each row is a data collection, with columns for connected source icons, file count, total storage size, access level, creation date, and row actions. Use this view to compare which collections hold meaningful content, which ones are shared, and which ones are still empty or private.
Creating a New Data Collection
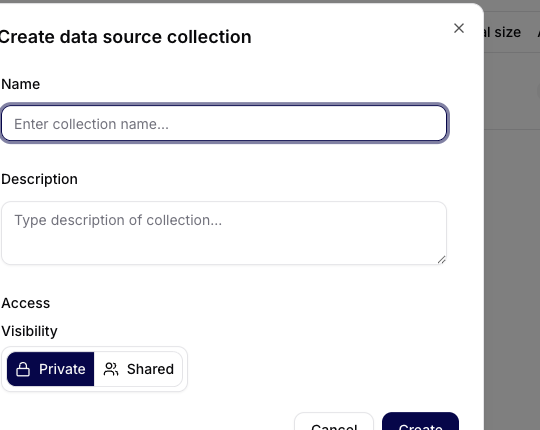
Click Create Collection to open the creation dialog.
Required fields:
- Name: a clear, unique collection name.
- Description: a short explanation of what the collection contains and who should use it.
After the collection is created, open it to add data sources.
Data Collection Detail
The collection detail page shows collection-level information and the list of sources inside the collection.
Use the detail page to:
- review collection name and creation information,
- see connected sources,
- open a source detail,
- create a new source,
- verify whether the collection has the content an agent needs.
Adding a Data Source
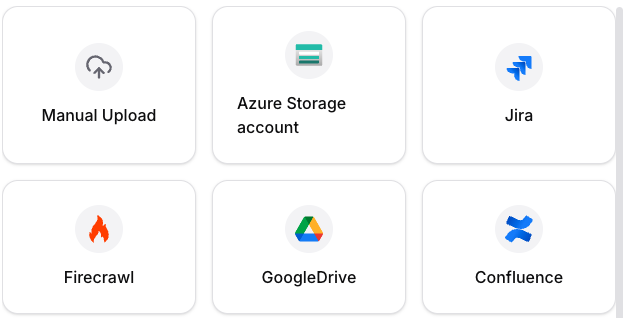
Use Add Data Source from the collection detail to create a source inside the collection.
Available source types depend on enabled connections and environment configuration. Manual Upload is always shown as a direct upload option, while integration-backed sources can include services such as Google Drive, Azure Storage Account, SharePoint, OneDrive, Jira, Confluence, Firecrawl, or other available connections.
If an integration source requires a connection that does not exist yet, create the connection first in Connections.
Create Source
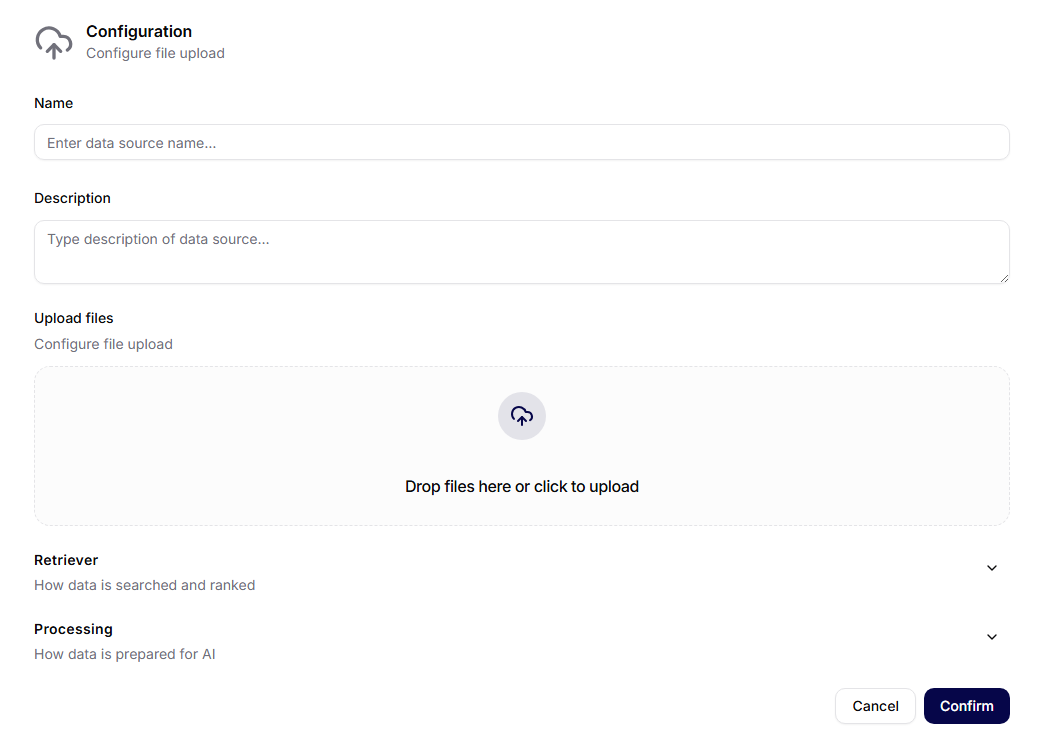
The create-source page is specific to the selected source type.
For Manual Upload, the form includes:
- Name: data source name.
- Description: optional explanation of the source.
- Upload Files: drag files into the upload area or select them from your computer.
- JSON Functions: optional structured functions for working with the source.
- JSON Metadata Definitions: optional metadata schema for uploaded content.
For integration-backed sources, the form uses the selected connection and asks for the settings needed by that service. Current source forms also group advanced setup into dedicated Retriever and Processing sections.
Retriever Section
Use Retriever for retrieval-oriented settings that affect how the source is searched later. These are advanced controls; leave them at defaults unless you are tuning retrieval quality for a specific source.
Processing Section
Use Processing for indexing and embedding preparation. Depending on source type, this section can include:
- Chunking strategy: how source text is split before indexing.
- Advanced content extraction: richer parsing for supported sources.
- Vector size: embedding size used during indexing.
- Vector quantization: storage/performance setting for embeddings.
Current vector options on dev include:
- Vector size:
Size1536orSize3072 - Vector quantization:
NoneorInt8
Use defaults unless you have a concrete retrieval-quality or storage reason to change them. Some source types show the full processing surface, while others hide specific fields such as chunking strategy when the source workflow manages that automatically.
After submitting the form, Siesta AI creates the source and starts processing the uploaded or connected content.
Source Lifecycle
A data source moves through a lifecycle before an agent can reliably use it:
- Create collection - define the logical container for the source material.
- Add source - choose manual upload or an integration-backed source.
- Connect provider - select or create the required connection for external systems.
- Sync content - import files, pages, issues, records, or crawled content.
- Parse and chunk - extract readable text and split it into searchable chunks.
- Index - make processed chunks available for retrieval.
- Inspect documents and chunks - verify that expected content was processed.
- Attach to agent - connect the collection to an agent with appropriate relevance and chunk settings.
Use manual upload for static files. Use integration-backed sources when content should be pulled from systems such as Google Drive, Azure Storage Account, SharePoint, OneDrive, Jira, Confluence, or Firecrawl.
Data Source Detail
Opening a data source shows a source-level detail page. The current source detail is organized into tabs:
- Overview
- Documents
- Logs
- Configuration
Overview
Use Overview to confirm the source type, basic source metadata, update behavior, and high-level status. This is the first place to check whether the source is configured as expected.
The screenshot shows a source overview inside the Business collection. The General info card confirms the source type, status, total size, file count, and latest sync. The Latest syncs card shows recent sync history and whether the run succeeded. The lower charts summarize files by processing status and file type, which helps admins spot failed processing or unexpected document mixes before agents rely on the source.

Documents
Use Documents to inspect files or records inside the source.
The documents table can show:
- document name,
- file type,
- size,
- processing status,
- whether the document is indexed,
- whether the document is readable,
- last update time,
- creation time.
Open a document detail to inspect extracted chunks, metadata, images, tables, and other parsed content. This is useful when an agent gives poor answers and you need to confirm whether the expected source text was actually indexed.
Logs
Use Logs to review source update events and processing activity. This helps diagnose failed syncs, upload problems, or unexpected source behavior.
Configuration
Use Configuration to review or adjust source settings. The available fields depend on source type and can include connection-specific source options, retriever settings, processing settings, chunking behavior, and vector configuration.
Data Source Status
Documents and sources can move through processing states. Common operational states include:
- Pending: the source or document is queued or waiting for processing.
- Processed: content is ready for use.
- Failed: content could not be processed or read correctly.
If an agent cannot answer from a source, first check the source detail, then the Documents tab, and finally the source logs.
The source detail also supports operational inspection through document lists, document details, extracted chunks, update history, and manual sync. These views help confirm whether a problem is caused by missing content, failed synchronization, parsing, indexing, or agent retrieval settings.
Connecting Data Collections to Agents
Data collections are assigned to agents in the agent configuration. Once connected, an agent can use indexed content as context for answers and workflow steps.
Keep collections focused. A smaller collection with clear ownership is easier to test, update, and troubleshoot than a broad collection containing unrelated content.
Typical Uses of Data Collections
Data collections are useful for:
- organizing many files under one topic,
- consolidating project or department knowledge,
- creating a reusable source of truth for agents,
- sharing one collection across multiple agents,
- troubleshooting whether source content is indexed correctly.
Troubleshooting Checklist
If an agent does not use expected data:
- Confirm the source connection still exists and has valid credentials.
- Check whether the source sync failed or has not run yet.
- Open the Documents tab and verify that the expected document or record exists.
- Open document chunks and confirm that readable text was extracted.
- Check whether the collection is attached to the agent.
- Review agent retrieval settings such as maximum chunks and relevance threshold.
- Inspect source logs and update history for provider errors, unreadable files, or permission issues.