Workflows
Workflows allow you to compose integration flows from pre-defined actions (HubSpot, Jira, Google Workspace, and others), and the orchestration is then triggered by agents or directly by users. This section is currently in beta mode.
Where to find them
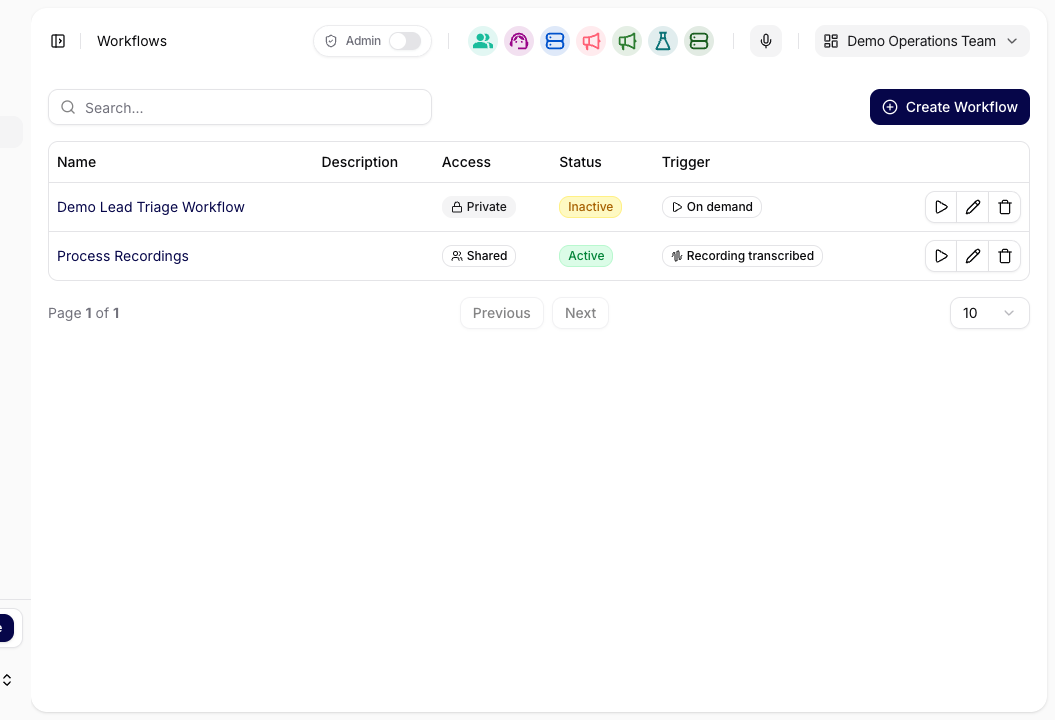
- In the left menu, click on Workflows (Beta).
- A list of existing workflows will appear, along with search, pagination, and a button Create workflows. An empty list displays the text No results.
Creating a new workflow
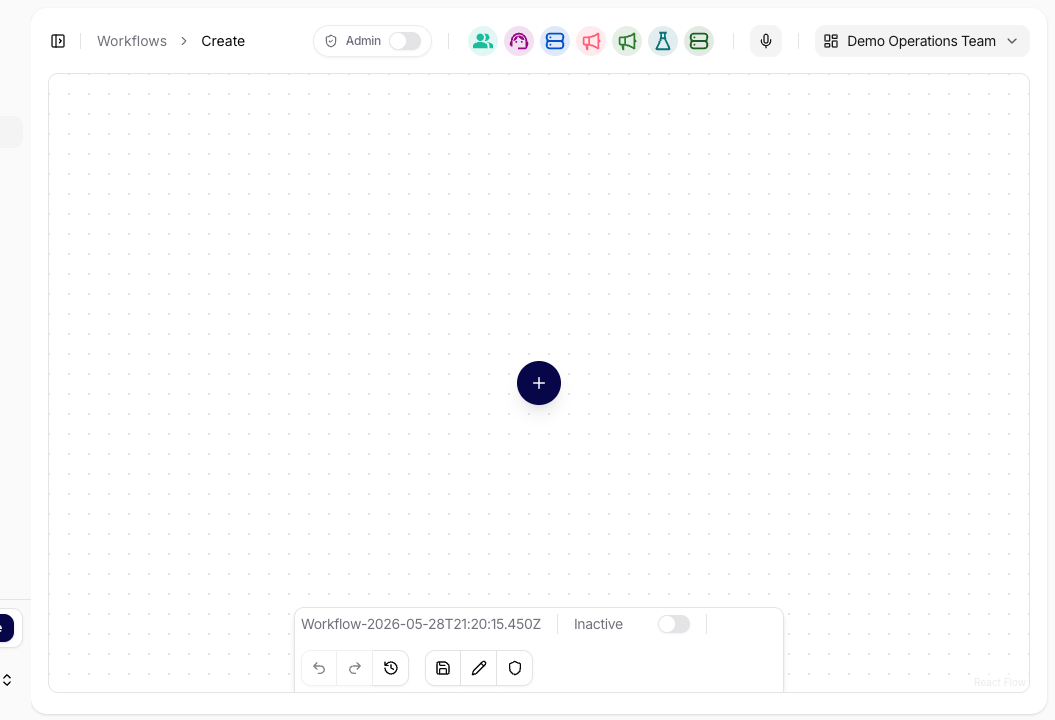
- Click on Create workflows.
- In the right panel, fill in the Name and Description – these are also used for searching.
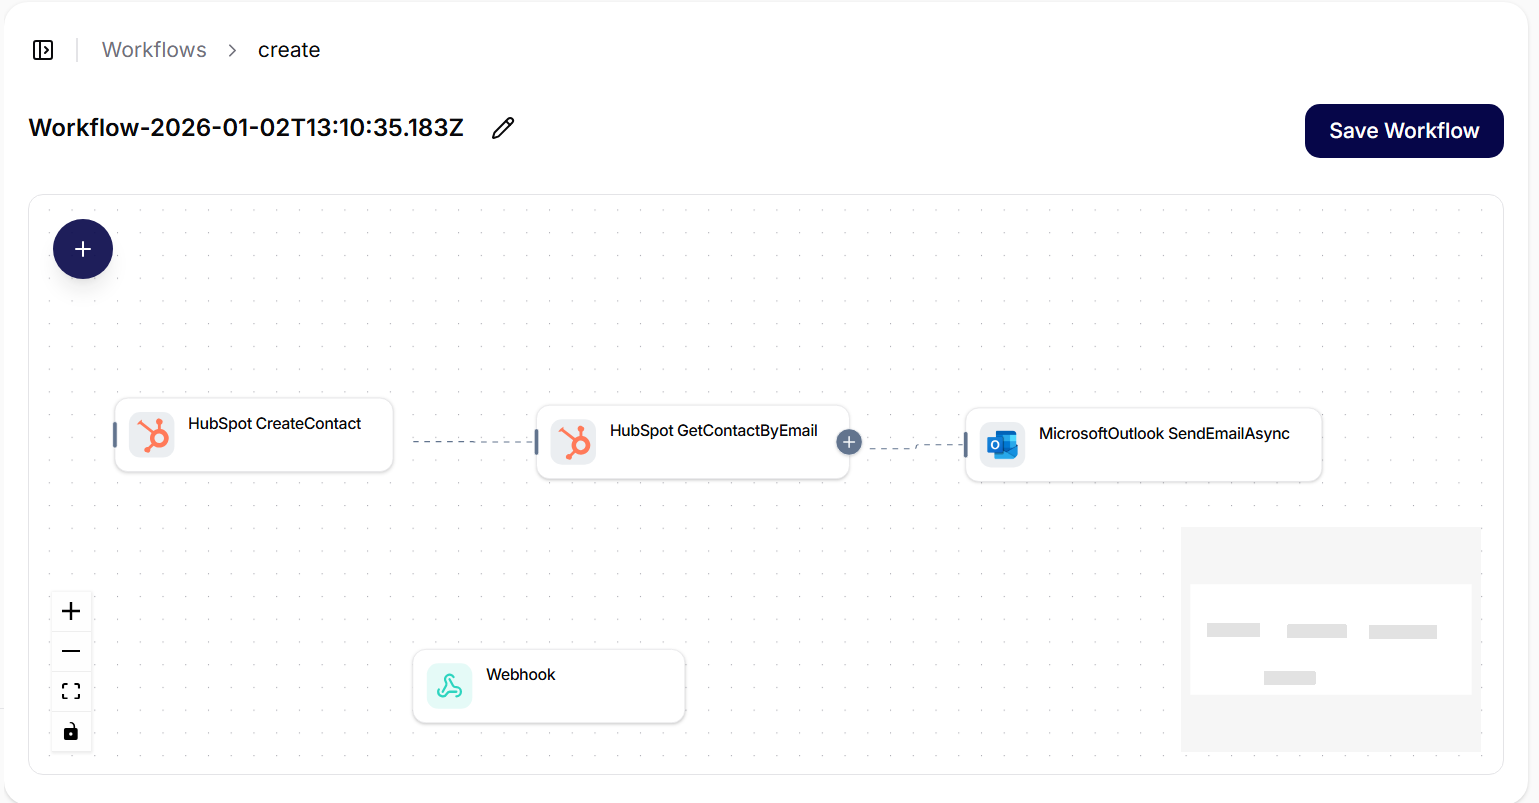
- Drag actions from the left panel Connections onto the canvas (e.g., HubSpot, Jira, Google Calendar, Google Drive).
- Connect the nodes by dragging lines – the output of the previous action is the input of the next.
- In the node settings, fill in the parameters (record IDs, emails, calendars, projects, etc.).
- Save by clicking on Save workflows.
- Zoom controls are at the bottom left, mini-map at the bottom right.
Empty canvas with the first trigger:
Adding a node from the catalog:
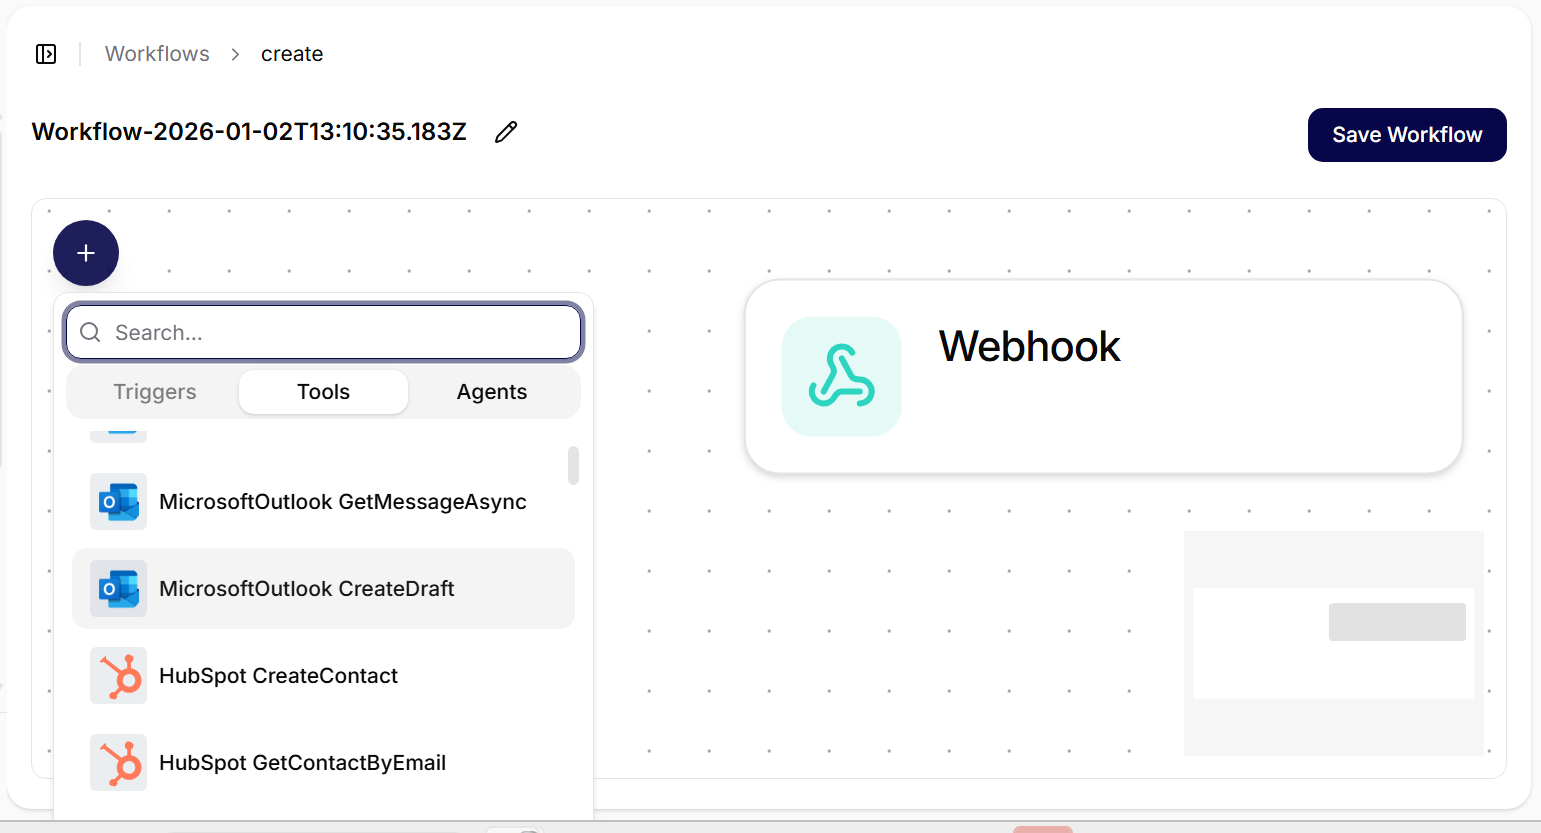
Node Catalog
The workflow builder groups available nodes into four catalog tabs:
- Triggers: entry points that start a workflow, such as Webhook, Schedule, or Recording transcribed.
- Tools: connection-backed functions from enabled connections and their tool functions.
- Agents: assistant nodes that send input to a selected agent and return the assistant result.
- Operators: system flow-control nodes that shape how data moves through the workflow.
Organization settings affect what appears in the catalog. For example, Webhook nodes require the Webhooks organization feature, Recording transcribed requires Recordings, and Tools depend on connection availability and governance.
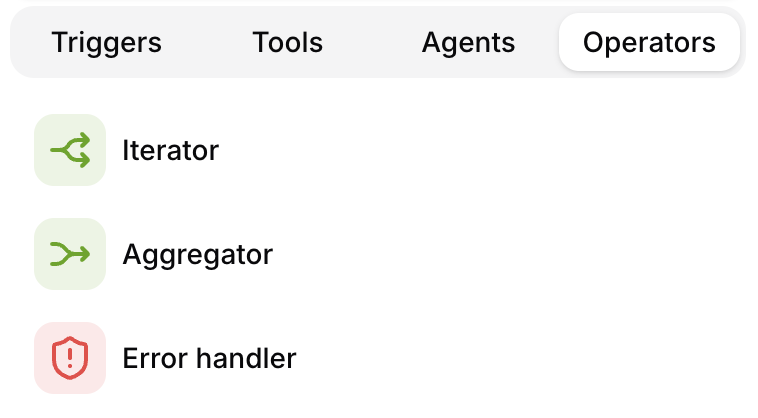
System Operators
Operators are built-in workflow nodes. They are not external connections and do not require credentials. Use them when the workflow needs to repeat work, collect results, or route around failures.
| Operator | Output fields | What it does |
|---|---|---|
| Iterator | item, index | Splits a collection or configured values into separate branches. Each item gets its own run path, and downstream nodes run once per item. |
| Aggregator | result, count | Collects values produced inside iterator branches and returns one combined result after the repeated work is complete. |
Iterator
Use Iterator when one workflow step returns or receives multiple items and the next steps should run once per item.
Inside each iteration:
itemcontains the current item value,indexcontains the zero-based position of the item,- downstream steps are isolated for that iteration,
- edge conditions are evaluated per item before the next node is queued.
Typical use cases:
- process every row returned by a data lookup,
- create one ticket per matching record,
- send one notification per item,
- call an agent once for each item in a list.
Aggregator
Use Aggregator after an Iterator when the workflow needs to collect per-item results back into one output. Aggregator settings define which values are collected from upstream node output.
When all iteration branches are complete, the Aggregator emits:
result: the aggregated collection,count: the number of aggregated items.
Use Aggregator when later workflow steps need a combined summary, a single payload, or one final assistant/tool call after all items have been processed.
Error Handler
The operator list can show Error handler as a system operator. Treat it as the place to design fallback behavior for failed or risky paths. If the current workspace does not expose configurable Error handler settings yet, use explicit fallback branches and conditions instead.
For now, handle workflow failures with:
- edge conditions where the preceding node exposes status or result fields,
- explicit fallback branches,
- tool approval and confirmation settings,
- workflow run history, node runs, Tool Executions, and Audit Log diagnostics.
When Error handler configuration is available in the workspace, document which failures it catches, what data it receives, whether it retries work, and what users should inspect when it runs.
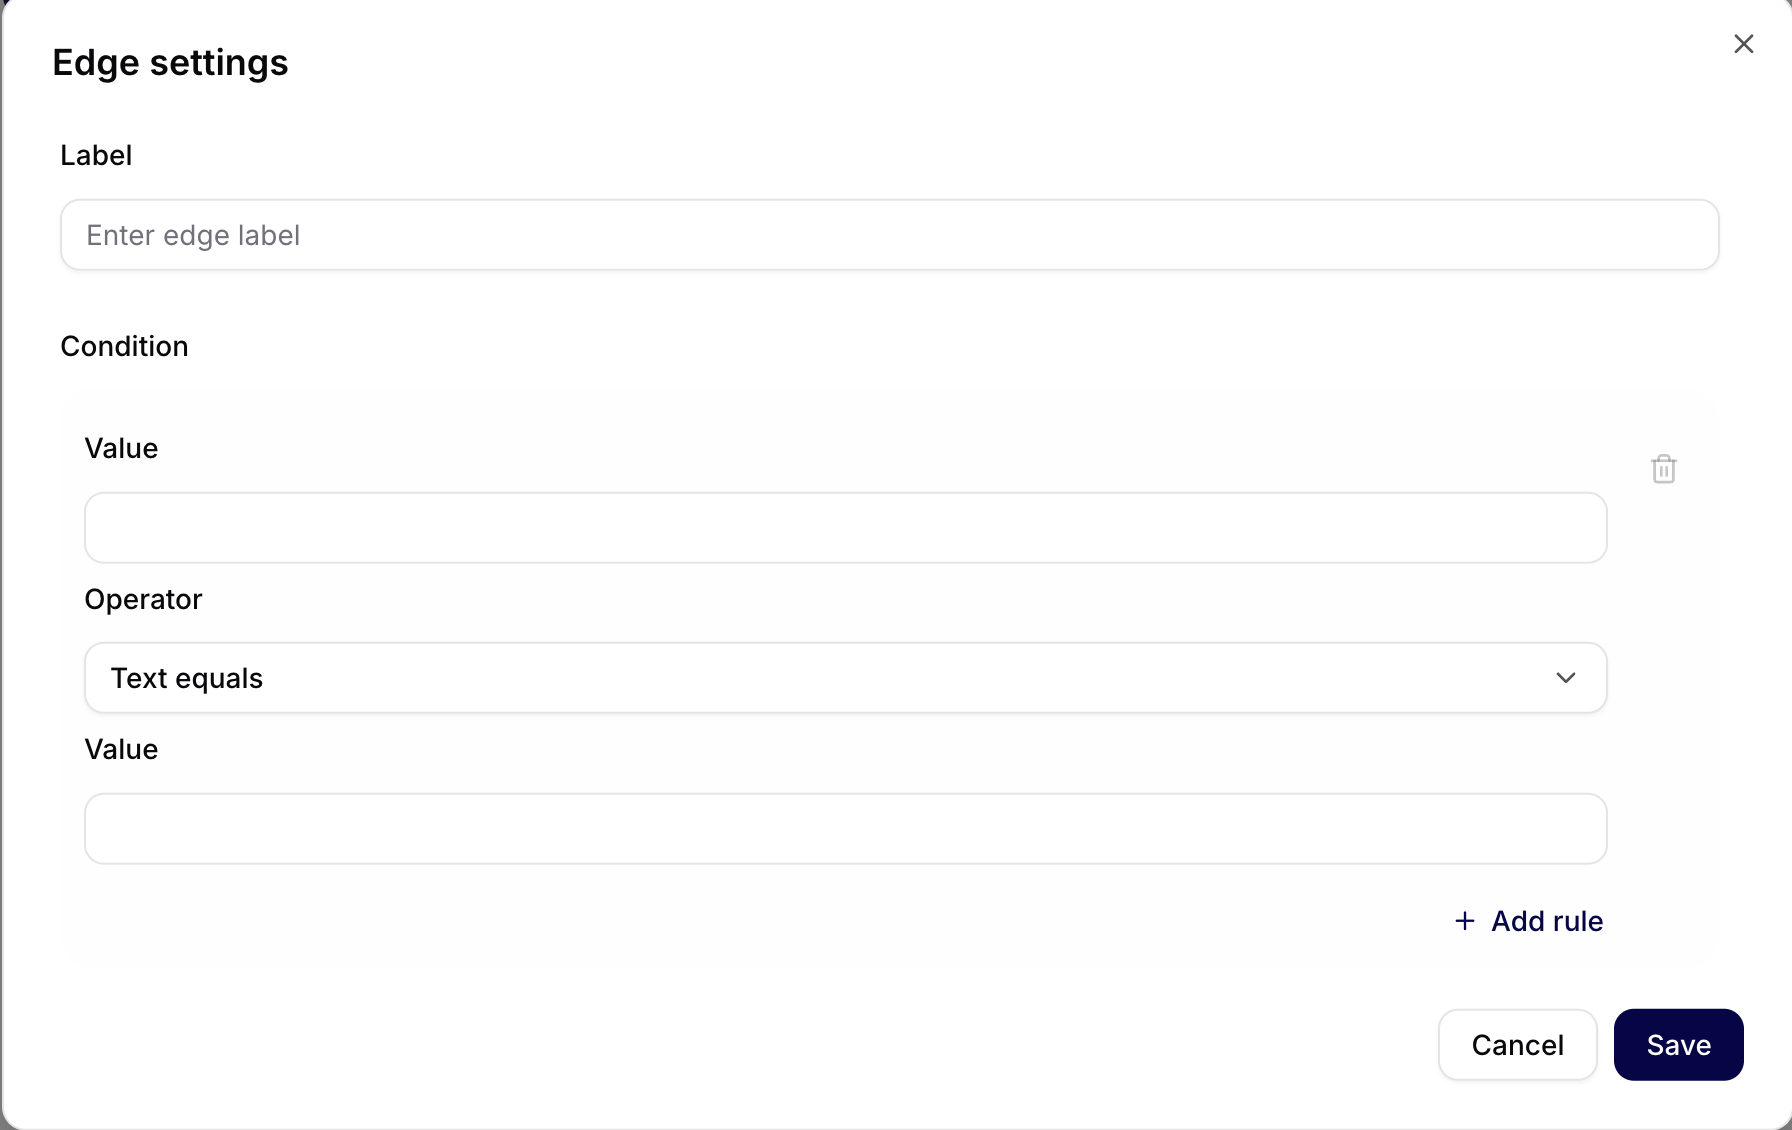
Edge settings (Conditions)
You can open Edge settings on the lines between nodes. In this section, you set conditions that determine when the workflow should take a specific branch.
Configurable items:
- Label for naming the branch.
- One or more rules in the Condition section.
- Operator (e.g.,
Text equals) and comparison value. - Add rule to add another condition.
Typical actions and examples
- HubSpot: GetDealById, GetContactById – reading a deal/contact before passing it to other systems.
- Jira: GetUserAsync, AssignTicketAsync, CreateTicketAsync – enriching a contact or creating a ticket.
- Google Calendar: CreateEventAsync – creating a meeting after successful data enrichment.
- Google Drive: ListFilesAsync, ReadFileAsync – working with documents.
- LLM / Webhook: calling a model or webhook to supplement logic, validation, or notification. You can find the procedure for creating a webhook on the Webhooks page.
Best practices
- Input validation: verify IDs, emails, and required parameters before connecting additional nodes.
- API errors: account for errors from integration services (timeout, rate limit) and add a fallback.
- Naming: name nodes according to their function (e.g., “Find HubSpot Contact”, “Create Jira Ticket”).
- Security: work only with access rights that are necessary for the given workflow; keep sensitive values in a vault/secrets.
Editing and management
- In the list of workflows, search for the name/keyword and open the item.
- You can edit, save, and rerun the workflow – changes will take effect in new runs.
- Recommended: after significant changes, test the flow on non-production data (test deals/tickets/calendar).
Workflow Detail
Opening a workflow takes you to its detail page at /internal/workflows/[workflowId]. The detail page is where you review the workflow canvas, edit nodes, test changes, and inspect how the workflow is configured.
Use the detail page to:
- review the trigger and connected actions,
- inspect node inputs and outputs,
- update node parameters,
- adjust edge conditions,
- check access and sharing,
- run or rerun the workflow when the workflow is ready to test,
- save changes before users or agents rely on the updated version.
When diagnosing a workflow, start from the trigger, then follow each node in order. Check whether required inputs are present before looking at later nodes, because a missing ID, email, file, or token at the beginning often causes downstream errors.
Running and Testing
Run workflows with test data before sharing them broadly. This is especially important when a workflow writes to external systems such as Jira, HubSpot, Google Calendar, or email.
Recommended testing flow:
- Use a non-production record or test account.
- Run the workflow once with the smallest possible input.
- Verify every external side effect in the target system.
- Check tool executions and logs if a node fails.
- Only then share the workflow with a team or connect it to an agent.
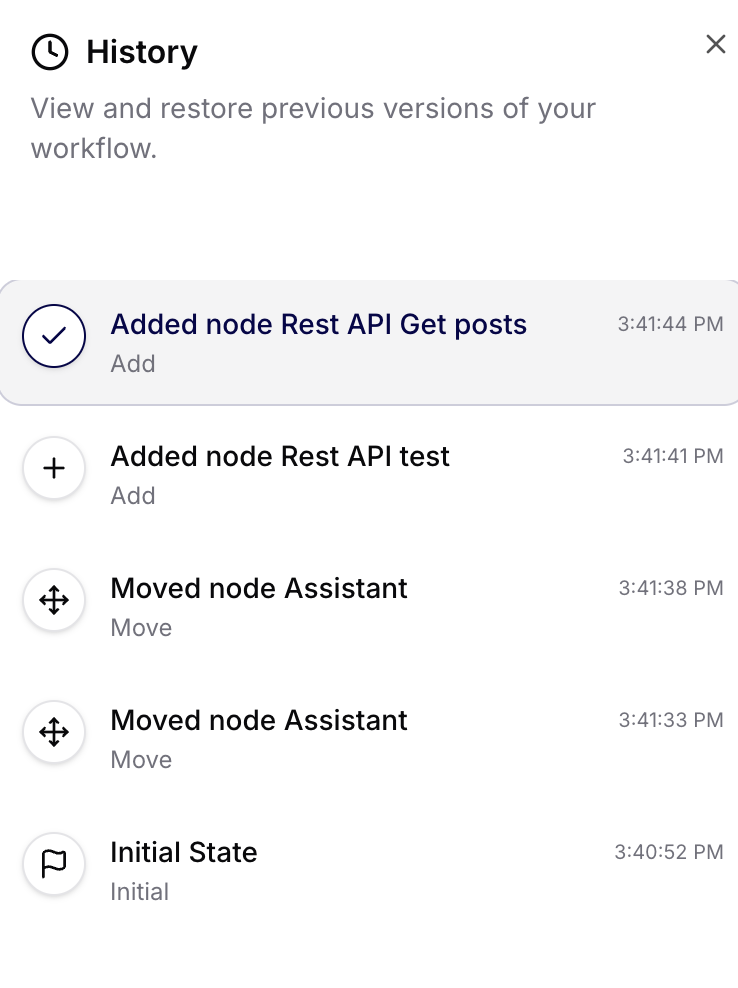
Change history
In the right panel History, you can view previous changes to the workflow (added/moved nodes, initial state) and revert to earlier versions.
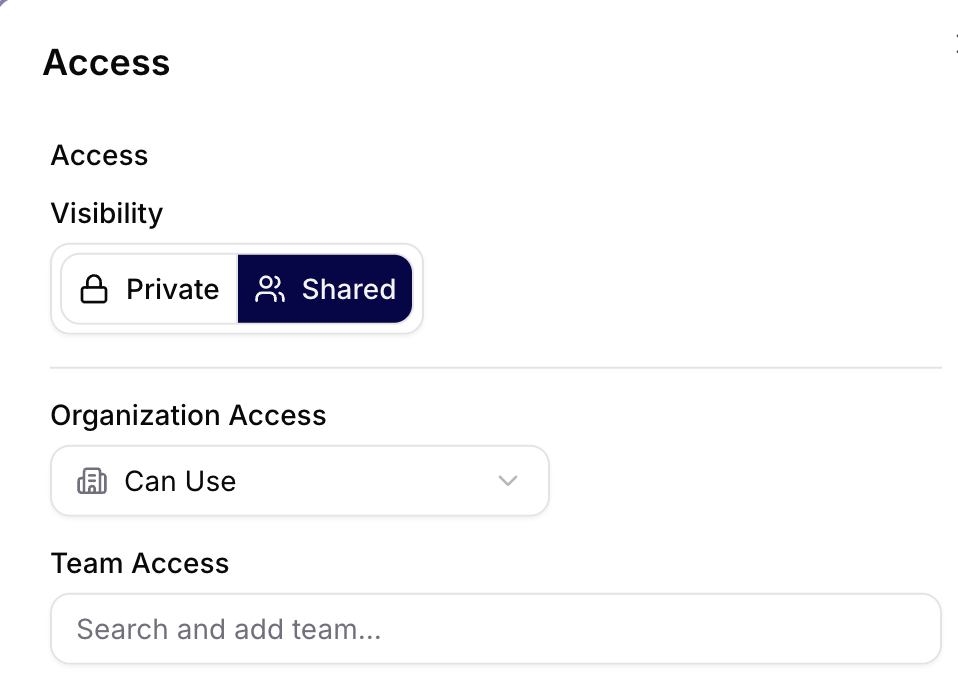
Sharing workflow
In the Access / Sharing section, you can set:
- Visibility (
Private/Shared), - Organization Access (e.g.,
Can Use), - Team Access to add specific teams.
This determines who can use or manage the workflow within the organization.
Diagnostics
When a workflow does not behave as expected, check:
- Node configuration: required parameters, IDs, email addresses, calendar IDs, project keys, and field mappings.
- Edge conditions: whether a condition is too strict or points to the wrong branch.
- Connection access: whether the workflow has access to the connection and function it needs.
- External API result: whether the target service returned an error, rate limit, permission issue, or validation error.
- Tool Executions: whether the underlying tool call is pending, failed, or waiting for approval.
- Audit Log: whether a recent configuration or access change affected the workflow.
If a workflow changed recently, compare the current version with the History panel before editing again.
Common scenarios
- Sync HubSpot → Jira → Calendar: obtaining a deal and contact, finding a user in Jira, creating a ticket and meeting.
- Incident intake: creating a ticket, attaching files from Drive, and notifying via webhook/LLM.
- Onboarding: creating a user in internal systems, adding to groups, and scheduling an introductory meeting.
Sample workflows: