Connections
Integration control plane
Connect tools, govern access, and give agents safe actions.
Connections are where Siesta AI links to SaaS apps, APIs, model providers, internal systems, and knowledge sources. Use the catalog to authorize the service, define access, assign it to agents or workflows, and control which functions can run automatically or with confirmation.
OAuth apps
Authorize provider accessUse Google, Microsoft, Slack, Jira, HubSpot, and similar providers when the connection depends on user or workspace OAuth.
Custom APIs
Define endpoint functionsUse REST API when admins need to expose selected HTTP methods, paths, headers, query params, and request bodies to agents.
Infrastructure
Connect cloud resourcesUse Azure and operational connections for governed access to resources, deployments, monitoring data, or service metadata.
Governance
Control who can use whatCombine private/shared access with function policies, confirmation rules, audit logs, and token budgets.
Connections represent the central place where all integrations of the Siesta AI platform with external services are managed, whether they are action tools, knowledge libraries, or the AI models themselves. Thanks to this section, administrators have an immediate overview of what resources are available and can add, modify, or remove them with just a few clicks. By integrating a new service, it immediately appears throughout the system and can be assigned directly when creating or modifying an agent.
The Connections section is used to work with external systems. Connections allow Siesta AI to link with third-party tools (APIs, SaaS platforms, internal systems) so that agents and workflows can read data, write changes, or trigger actions.
How It Works
- Management: In the Connections section, you activate a specific connection, set access (OAuth / API key), and assign it to agents or workflows.
- Usage: Connection actions are called from prompts, tools, or automations (e.g., send an email, retrieve data from CRM).
- Security: Access tokens are stored in encrypted form, and all operations are fully audited.
Overview of the Connections Section
- A search field at the top for quick filtering of connections.
- A table with columns: Name, Type, Created, Access + actions on the right (menu ...).
- A Add Integration button to create a new connection.
- Examples of available connections: Jira, Google Search, HubSpot, OpenAI, GitHub, Clockify, Google Tag Manager, Google PageSpeed, Office 365 Word, Office 365 Excel, and Outlook Calendar.


In the detail of individual connections, permission scopes and allowed functions can be set. Administrators specify which actions are available, whether they require confirmation, and what access the connection has (shared or private).
Connection Governance
Connection governance defines which integration types and functions are available across the organization. It is managed as part of organization security and affects agents, workflows, and tool execution behavior.
Governance has two levels:
- Connection type policy controls whether a whole connection type is enabled or disabled for the organization.
- Function override controls individual functions inside a connection type when the connection supports function-level governance.
Function access modes are:
- Disabled - agents and workflows cannot use the function.
- Enabled - the function can run when the agent or workflow has access to the connection.
- EnabledWithConfirmation - the function is available, but execution must be approved before it continues.
Use stricter governance for data-modifying functions, such as sending emails, creating tickets, updating CRM records, writing files, or triggering external workflows. Read-only functions can often be enabled with lower risk, but they should still follow the principle of least privilege.
Connection access still matters:
- Private connections are available only to their owner unless explicitly assigned where supported.
- Shared connections can be reused by multiple users, agents, or workflows according to access rules.
Governance and access work together. A user may have access to a connection, but a disabled function remains unavailable. A function set to confirmation can be proposed by an agent, but it appears in Tool Executions as waiting for approval before it runs.
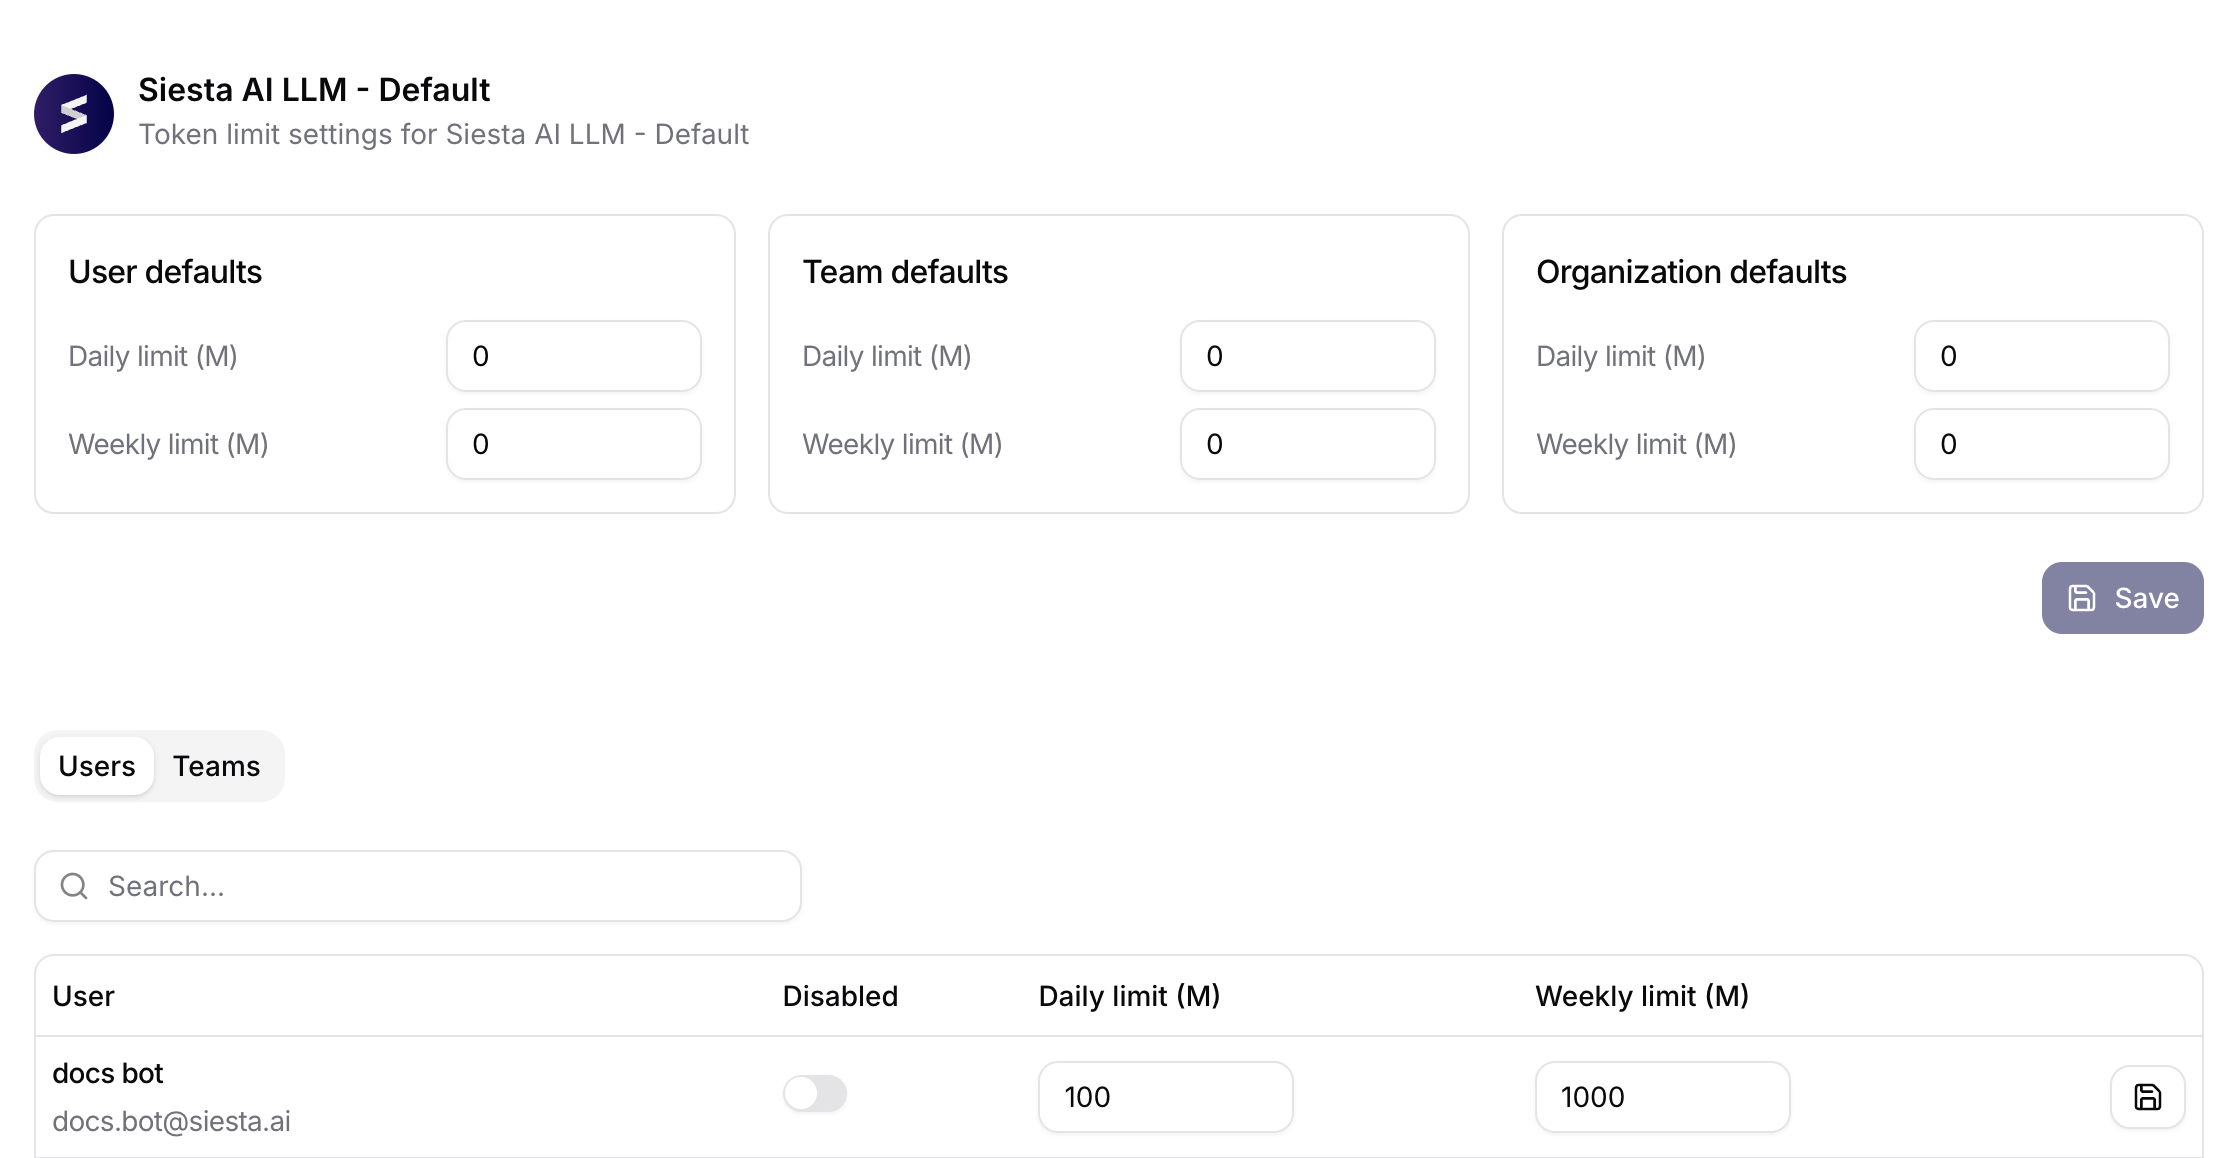
Token Limits
Some AI/model connections include Token limits. Open the connection detail and choose the token limits view to define daily and weekly token budgets for that connection.
Token limits can be managed at several levels:
- Organization defaults: baseline daily and weekly limits for the connection.
- User limits: overrides for individual users who need tighter or broader budgets.
- Team limits: overrides for teams that share a specific workflow or operational budget.
Limits are configured in millions of tokens. Leaving a field empty means that no explicit limit is set for that period at that level. User and team limit records can also be disabled when an override should exist but not currently apply.
Use token limits when:
- one shared model connection is available to many users,
- a team runs high-volume research or automation,
- a pilot workflow should have a predictable budget,
- admins need to prevent accidental overuse without removing access.
When a configured budget is exceeded, the conversation should stop with a clear token-limit message instead of a generic model failure.
Token limits are preventive guardrails. Use Analytics Cost charts to understand historical input, output, reasoning, model, and agent token trends, then adjust organization, user, or team limits to match the expected operating budget.
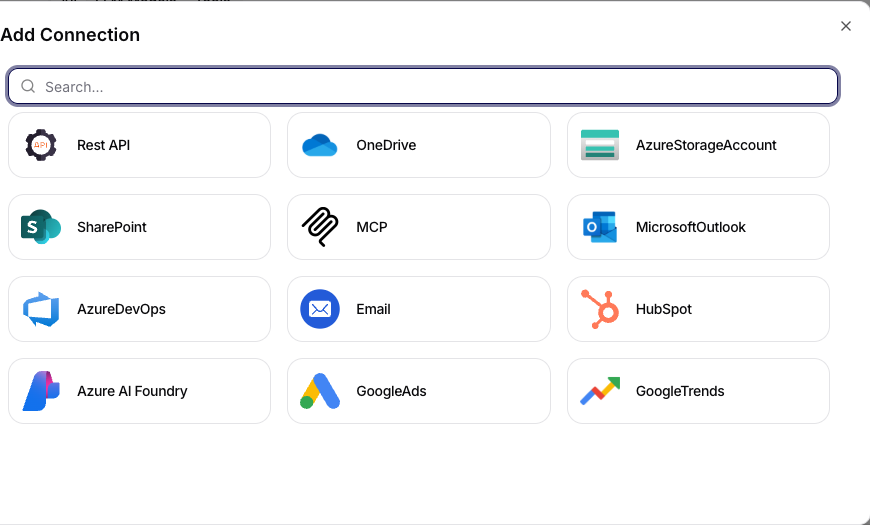
Adding a New Connection
After clicking on Add Connection, a dialog opens with a search field and a list of available connections (e.g., Gmail, Google Calendar, Google Drive, Slack App, OpenAI).
Depending on the selected type of connection, the user is redirected to the provider's page, where they must allow Siesta AI access to the service.
After successful confirmation, the user is prompted to name their new connection. After entering the name and confirming, the new connection is added.
Available connection types depend on the released tool surface and tenant configuration. In current dev releases, the catalog can include both classic business tools and operational helpers such as GitHub repository automation, Clockify work tracking, analytics, document-generation, spreadsheet, calendar, and website-performance integrations.
Related Guides
- Admins: Configure Shared and Private Connections
- Admins: Set Up Tools, APIs, and MCP Access
- Users: Use Connections Safely