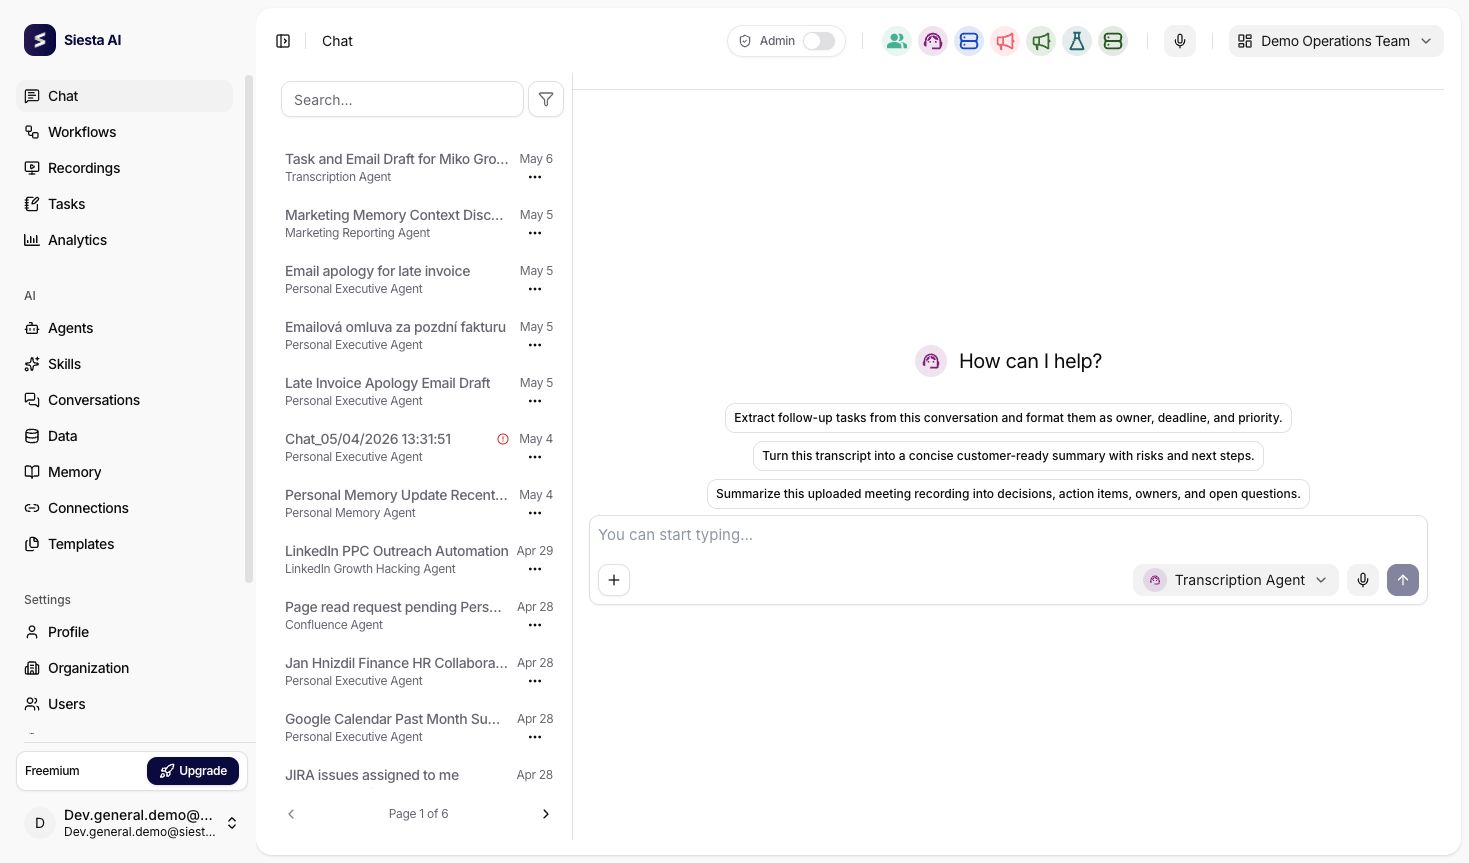
Chat
The Chat section is used for conversations with AI agents that are created and configured in the Agents section of the platform. Users can start new conversations, browse the history of previous chats, use prompt suggestions, upload supporting files, and provide feedback on responses.
Chat Input and File Uploads
The chat input supports both written instructions and attached context. Users can type a message, upload files from the attachment button, or drag and drop files directly into the chat area. This is useful when the agent should work with a document, spreadsheet, image, exported report, screenshot, or another file that is not already available through Data, Memory, or a connected system.
When attaching files, describe what the agent should do with them. For example, ask the agent to summarize a PDF, compare two documents, extract action items from meeting notes, read a screenshot, or analyze a spreadsheet. Clear instructions help the agent focus on the right parts of the uploaded content.
If the selected agent has Code interpreter enabled, it can perform more advanced file work, such as inspecting spreadsheets, transforming tabular data, cleaning CSV exports, generating charts, or creating downloadable output files. This makes chat suitable for lightweight analysis and file preparation without leaving the conversation. For sensitive or business-critical files, users should still verify the result before using it externally.
Starting a New Conversation
A new chat is automatically opened when the Chat tab is opened. Alternatively, if the user has an existing chat open, there is a New Chat button in the top right corner.
At the start of a conversation, the chat shows the selected agent, the message composer, available input actions, and any prompt suggestions prepared for the user. Prompt suggestions work as reusable starting points: the user can click one instead of writing the first instruction from scratch, then adjust the text before sending it.
The composer supports typed instructions, file attachments, drag-and-drop uploads, voice input, agent selection, and message sending. This gives the user one place to ask a question, provide context, upload supporting material, and choose the agent that should handle the request.
When realtime voice is available for the selected agent, users can start from an already open conversation or directly from the empty-state composer before the first text message is sent.
By sending the first message, the chat is initialized, and the newly created chat appears on the right in the conversation list, where it can be renamed.
Chat Interface
The main screen is divided into two parts:
- on the left, the history of all conversations is displayed (including the title, the agent used, and the date),
- on the right, the actual communication with the selected agent takes place.
The user types their queries into the input field at the bottom of the screen and sends them by pressing the Send button. There is also an option to activate voice input, attach files, or drag and drop files into the conversation.
The agent responds in real-time, with each message being stored within the given conversation.
Public chat, widget embedding, authenticated widget mode, privacy links, and public realtime access are configured on the agent itself. See Agents > Interfaces for those settings.
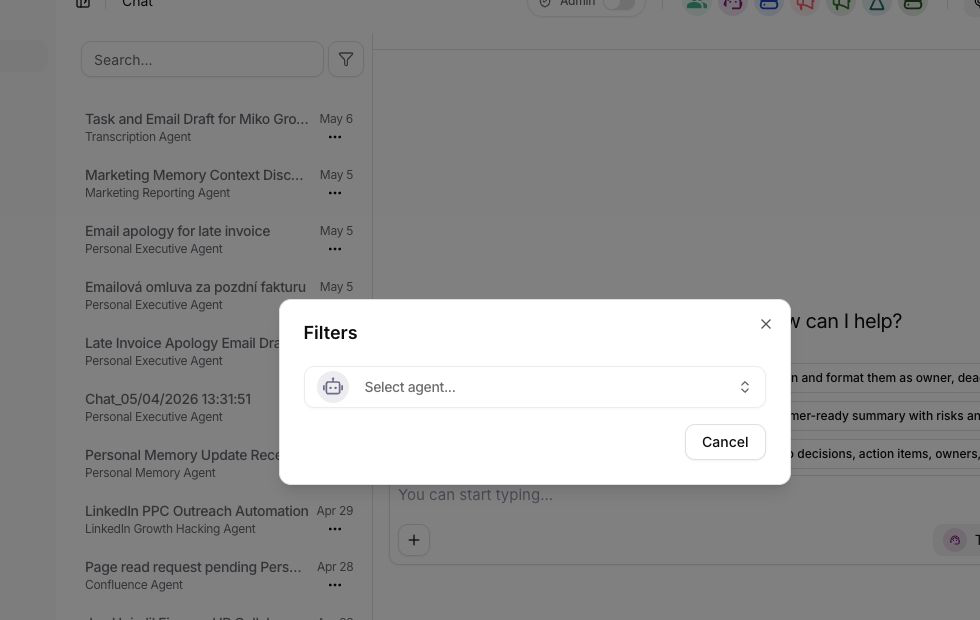
Filtering and Managing Conversations
- The left panel allows for quick browsing of the history, including titles and the date of the last activity.
- By clicking on … next to a conversation, you can quickly rename or delete the chat.
- Filters (icon in the top panel of the list) allow filtering conversations by a specific agent. The filter for the selected agent can be removed by clicking on the trash icon and confirming the change with the Send button.
Submitting a Query
- The input field supports text, attachments, and voice dictation (microphone).
- Submitting a query: arrow or keyboard shortcut Enter / Cmd + Enter (depending on settings).
 The microphone status (active/disabled) is visible right next to the agent selection. When recording, an icon is activated, and the status is displayed in the input field.
Realtime and Voice Conversations
Siesta AI supports realtime conversation flows for interactive voice-style experiences. A realtime session is always connected to a specific conversation, so messages, transcripts, tool activity, feedback, and audit context remain tied to the same conversation history as standard chat.
Realtime can be used in two contexts:
- Internal chat: authenticated users start a realtime session from an existing or newly created conversation.
- Public chat: public or embedded chat can use realtime only when public chat and realtime public access are enabled for the organization and agent.
The realtime flow has two steps:
- The client creates a
realtime-sessionfor the conversation. - The client connects to the returned WebSocket path and streams audio/events for that session.
In the UI, realtime controls can expose:
- a voice start action directly in the composer,
- persona or voice selection controls,
- audio activity indicators,
- approval waiting state when a tool call must be confirmed before the session can continue.
Session behavior is controlled by platform limits. The current backend defaults include a short session token lifetime, an idle timeout of 60 seconds, a maximum session duration of 1,800 seconds, up to 2 concurrent sessions per user, and up to 100 concurrent sessions per organization. The supported input and output audio format is pcm16, and the default supported voice is alloy.
If the session expires, becomes idle, exceeds the maximum duration, or violates origin/security checks, the client should create a new session before reconnecting. Realtime sessions remain tied to the same conversation, so transcripts, tool events, and persisted messages stay in the conversation history instead of being stored separately.
For public chat and widgets, administrators should review public chat settings, allowed origins, content safety, prompt shield settings, and privacy disclosures before enabling realtime for customer-facing use.
Feedback on Responses
Under each agent response, it is possible to copy the response or click on the thumbs up or down icon, allowing the user to provide quick feedback on the agent's response.
After submitting a rating, a Send feedback window will also appear, where a specific comment on the agent's response can be added. This feedback is automatically sent to the admin interface upon submission.
This mechanism allows administrators to monitor the quality of responses, analyze strengths and weaknesses in the underlying data, and subsequently optimize agent settings.
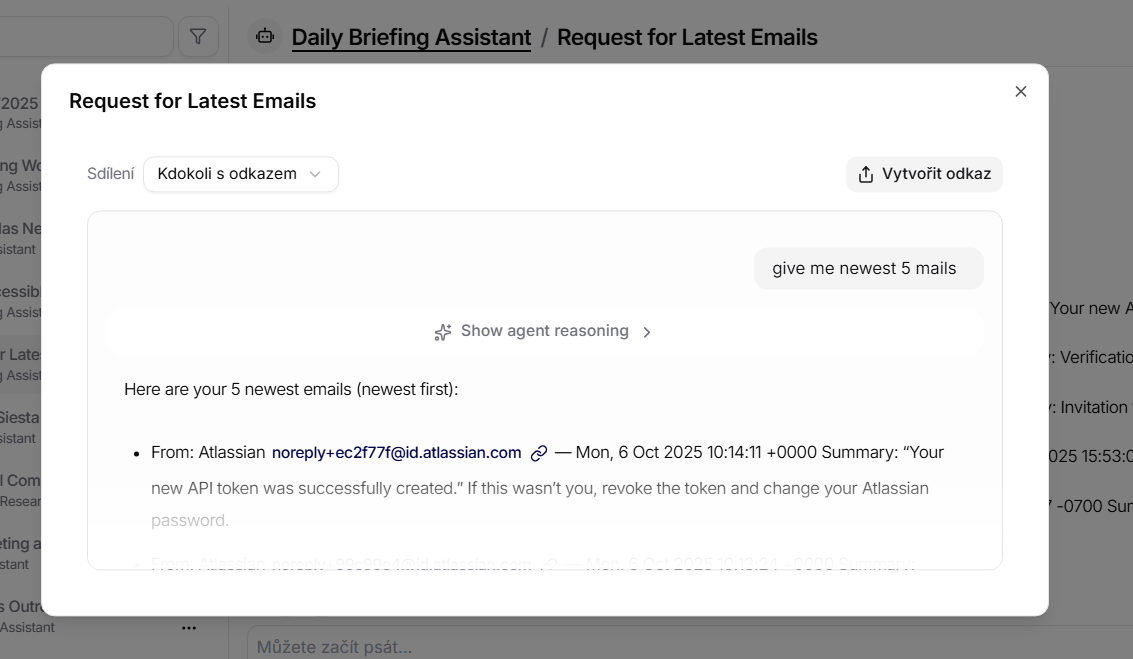
Sharing a Conversation
The chat can be shared via a link. In the conversation detail, click on Share and choose who can open the link. The preview shows the content of the shared chat, including the latest messages and the prompt that initiated the conversation.
If the shared conversation contains generated artifacts or realtime messages, verify the preview before sending the link so the recipient sees the intended final state.