Users
Use Users to manage existing accounts, invite people, and assign the roles that control what they can do in Siesta AI.
The Users area contains the same three tabs shown in the application:
| Tab | What it manages | Permission needed to open it |
|---|---|---|
| Users | Accounts, invitations, imports, and assigned roles | Users.View |
| Teams | Team membership and team settings | Teams.View |
| Roles | Built-in and custom roles | Users.ManageRoles (Assign roles) |
Only tabs allowed by a person's effective permissions are shown. If Users is unavailable but Teams is allowed, the application opens the first available tab instead.
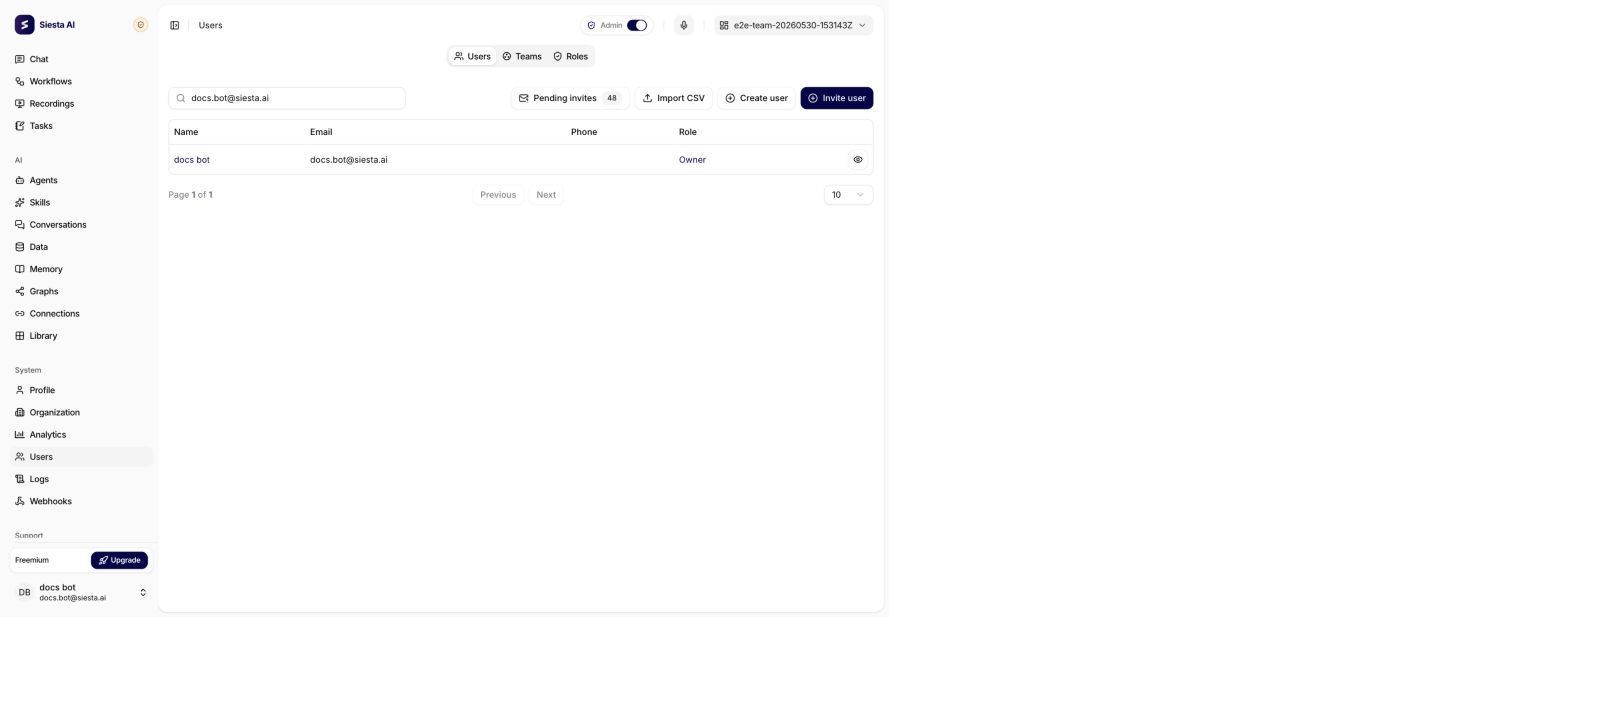
The main table shows user names, emails, and assigned roles. Use search to find a person, open a user for details, or use the actions at the top of the table for invitation workflows.
User Detail
Open a user from the list to review and maintain one specific account.
Use the detail page to check:
- account identity and contact information,
- assigned roles,
- team membership,
- account status,
- available administrative actions.
Use user detail when troubleshooting access. If a user cannot see an agent, workflow, data collection, or admin area, check the user's role first, then team membership, and then the access settings of the target resource.
Assigning Roles to a User
If you have Assign roles, open the action menu for another user and select Assign Role. Select every role that the user should keep, then choose Save. The dialog replaces the complete assigned-role set, so clearing a role removes it from that user.

A user can hold more than one role. Their effective permissions are additive: if any assigned role grants an action, the user receives it. Removing a permission from one role does not remove the same permission when another assigned role still grants it.
Role assignment has these safeguards:
- You cannot change your own roles from the Users area.
- Only an Owner can add or remove the Owner role.
- An organization must always retain at least one active Owner.
- A non-Owner role manager can assign only roles whose complete permission set they hold themselves.
Creating a New User
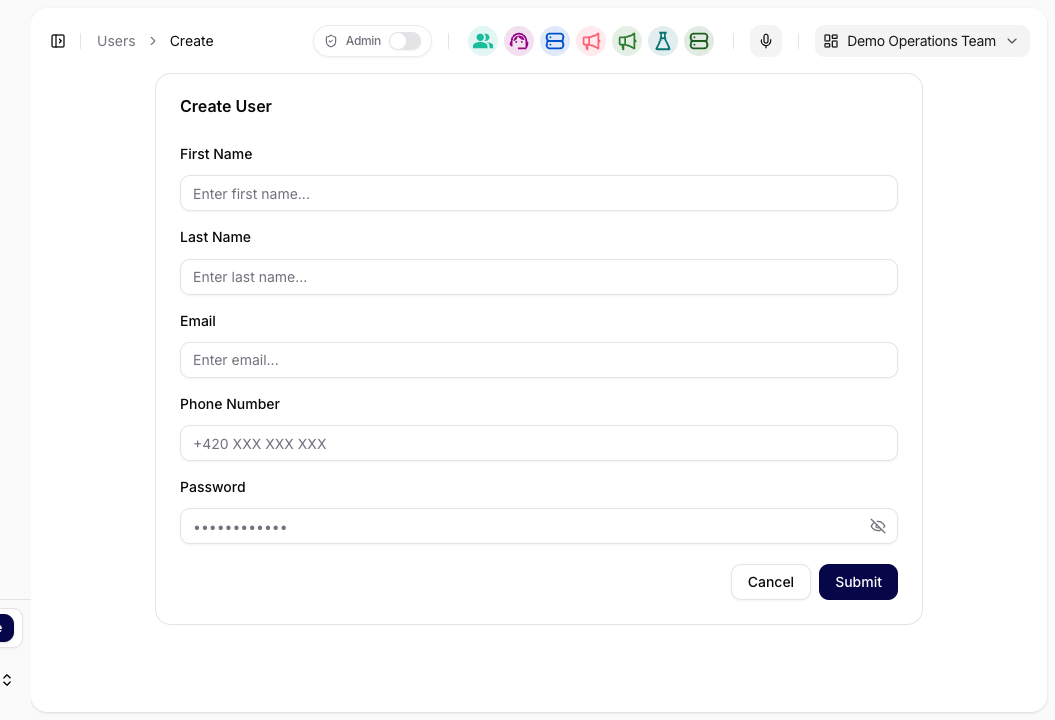
Use Create User when the account should be created immediately by an administrator.
The form asks for:
- First Name
- Last Name
- Phone Number (optional)
- Password
Confirm with Submit, or close the dialog with Cancel.
Inviting Users
Use Invite User when the person should receive an email invitation and finish the account setup themselves.
The invitation form asks for:
- First Name
- Last Name
- Role
After the invitation is sent, the recipient receives an email with a link to join Siesta AI. The link takes them to the Siesta AI app, where they can finish account setup with a password-based signup flow or through configured SSO. Invitations expire after 7 days.
If an invitation already exists for the same email:
- an active pending invitation is resent,
- an expired or revoked invitation is refreshed with a new token and expiration,
- an email that already belongs to an existing user is rejected.
Only an Owner can send an invitation that assigns the Owner role. Other role managers see only roles whose permissions they are allowed to assign.
Domain-Based Onboarding
For organizations that want users to join without a manual invitation for every person, the Siesta AI team can enable domain-based onboarding.
When domain-based onboarding is active, Siesta AI recognizes approved company email domains. If a new user signs in with Google or Microsoft using one of those domains, Siesta AI can automatically associate the account with the correct organization.
Use domain-based onboarding when:
- the organization has a controlled company email domain,
- users should be able to join through Google or Microsoft SSO,
- admins want to reduce manual invitation work for larger teams.
Contact the Siesta AI team to configure approved domains and confirm the expected onboarding behavior before rolling it out.
Microsoft Entra Synchronization
Use Microsoft Entra Sync when organization groups and membership should be managed from Microsoft Entra ID instead of maintained manually in Siesta AI.
Configure Microsoft SSO first. Then open Organization → Security → User Management and use Sync Microsoft Entra Groups. After synchronization, review the imported users, their roles, and their team membership before granting access to production resources.
See Organization Security for the tenant-wide SSO and synchronization controls.
Pending Invitations and Revoking Access
Use Pending Invites to review invitations that have not been accepted yet. The list includes the invitee email, name, role, status, creation time, and expiration.
You can revoke a pending invitation when:
- the invite was sent to the wrong person,
- the person should no longer join the organization,
- the role or access plan changed before the invite was accepted.
Revoking changes the invitation status to Revoked. Only pending invitations can be revoked; accepted, expired, or already revoked invitations cannot be revoked again.
Bulk Invitation from CSV
Use Import CSV when you need to invite several users at once. The CSV file must use these headers:
email,firstName,lastName
allen.bowman95@demo.local,Allen,Bowman
shannon.harper100@example.com,Shannon,Harper
lisa.jackson320@demo.local,Lisa,Jackson
victor.martinez169@demo.local,Victor,Martinez
thomas.blackwell821@example.com,Thomas,Blackwell

CSV import creates invitations with the default User role. Use the single Invite User flow when you need to choose a different role during invitation.
Before importing:
- keep the file as
.csvortext/csv, - include the exact headers
email,firstName, andlastName, - make sure every row has a valid email address,
- remove duplicate emails,
- keep the file under 1 MB.
After import, each row is processed separately. The result can show:
- Created: a new invitation was created and emailed,
- Resent: an existing active pending invitation was emailed again,
- Refreshed: an expired or revoked invitation was renewed,
- Ignored: a duplicate email was skipped,
- Failed: the row had missing names, an invalid email, an existing user, or another validation problem.
User Roles
Siesta AI provides the built-in roles Owner, Admin, Editor, and User. An organization can also define custom roles. A user may have multiple roles, and the permissions contributed by those roles are combined.
The initial invitation selects one role. After the account exists, a role manager can update the complete assigned-role set from the Users list or manage members from a role detail.
Roles define platform capabilities. Teams and resource access policies define which shared resources those capabilities apply to. Use them together: roles answer "what can this user do?", while teams and access policies answer "which shared resources can this user reach?".
See Roles and Permissions for the complete backend permission catalog, built-in defaults, dependencies, custom roles, and safe assignment rules.
Related Guides
- Admins: Create Teams and Assign Users
- Admins: Define Access Policies and Visibility Rules
- Users: User Guide