Chat
The Chat section is used for conversations with AI assistants that are created and configured in the Assistants section of the platform. Users can start new conversations, browse the history of previous chats, and provide feedback on responses.
Starting a New Conversation
A new chat is initiated using the New Chat button. After clicking it, a modal window appears where the user:
- enters the conversation title,
- selects the assistant they want to communicate with (from a list of previously created ones),
- optionally has the option to go directly to creating a new assistant.
By confirming the selection with the Submit button, the chat is initialized, and the main conversation interface opens for the user.
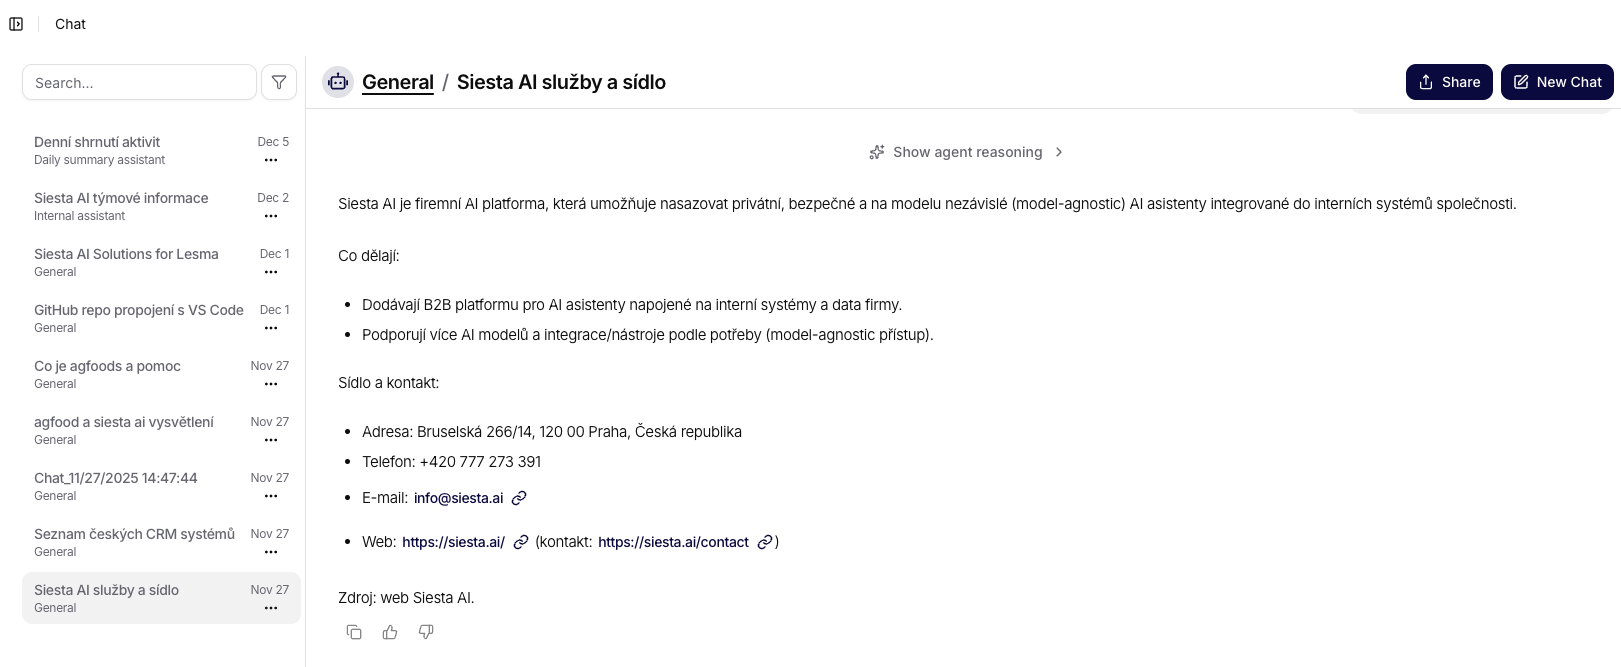
Chat Interface
The main screen is divided into two parts:
- on the left, the history of all conversations is displayed (including the title and date),
- on the right, the actual communication with the selected assistant takes place.
The user types their questions into the input field at the bottom of the screen and sends them by pressing the Send button. There is also an option to activate voice input or attach an additional file.
The assistant responds in real-time, with each message being retained within the given conversation.
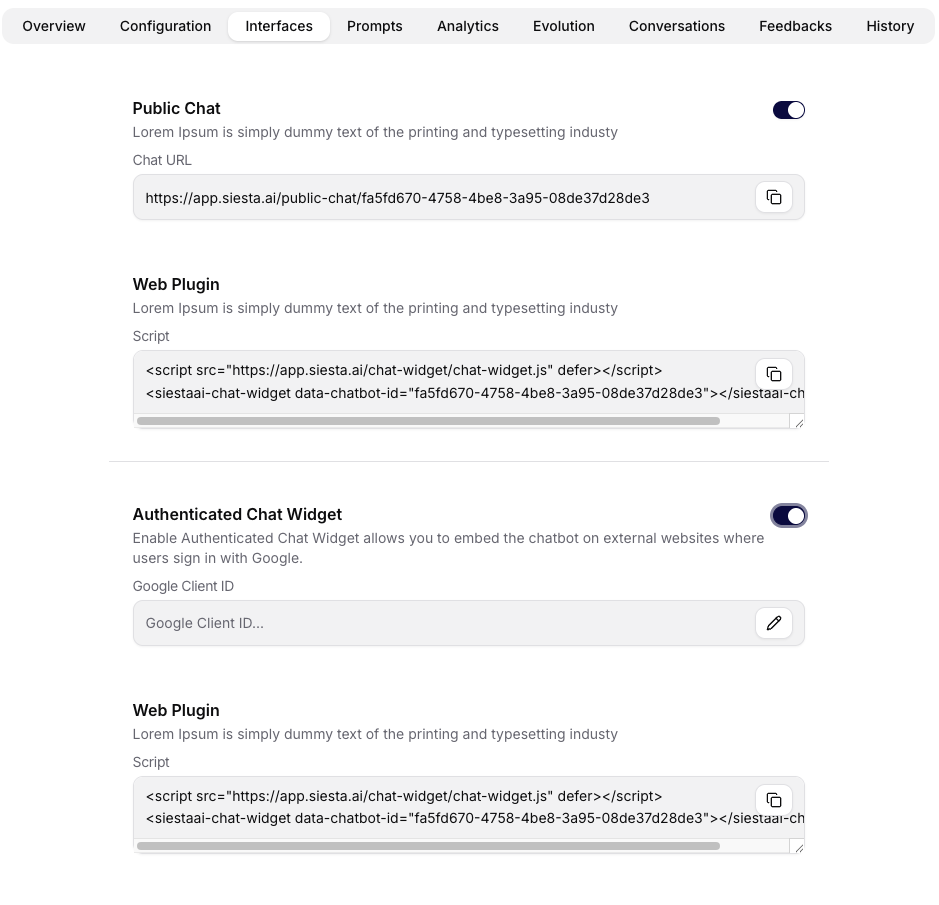
Interface Settings (Public Chat and Widget)
In the assistant detail under the Interface tab, you can set how the chat will be available to users outside the application:
- Public Chat – the switch activates the public chat and generates a Chat URL with a button to copy the link.
- Web Plugin – an embeddable script for embedding the chat on an external website.
- Authenticated Chat Widget – a switch for the widget with login; you will need to provide the Google Client ID and use a second embed code.
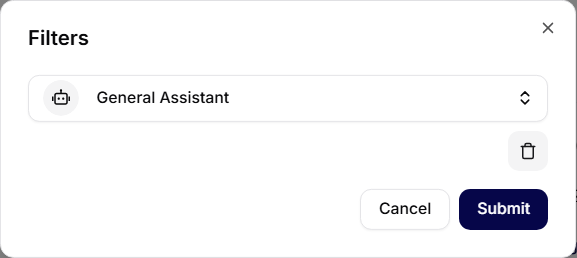
Filtering and Managing Conversations
- The left panel allows for a quick review of the history, including titles and the date of the last activity.
- By clicking on … next to a conversation, you can quickly rename or delete the chat.
- Filters (icon in the top panel of the list) allow you to switch the view to a specific assistant or category (e.g., General vs. Work). The selected assistant can be removed by clicking on the trash icon and confirming the change with the Submit button.
Entering a Query and Switching Assistants
- The input field supports text, attachment uploads, and voice dictation (microphone).
- To the right of the text, you can switch the active assistant without needing to start a new chat.
- Sending a query: arrow or keyboard shortcut Enter / Cmd + Enter (depending on settings).
 The microphone status (active/disabled) is visible right next to the assistant selection. When recording, the icon activates, and the status is displayed in the input field.
Feedback on Responses
Under each response from the assistant, users can click on the thumbs up or down icon, providing quick feedback on the given response.
In the case of a negative rating, a New Feedback window will also appear, where users can add a specific comment explaining why the response was not relevant, accurate, or expected. This feedback is automatically sent to the administrative interface upon submission.
Thanks to this mechanism, administrators can monitor the quality of responses, analyze shortcomings in the materials or data, and optimize the settings of the assistants.
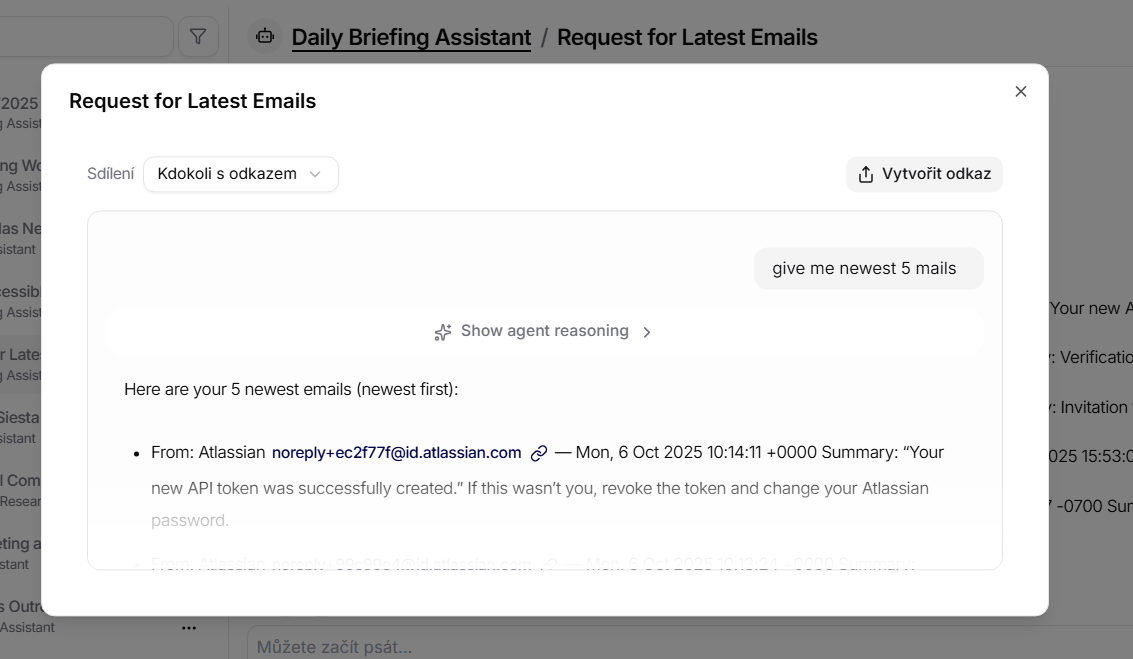
Sharing a Conversation
The chat can be shared via a link. In the conversation detail, click on Share and choose who can open the link. A preview shows the content of the shared chat, including the latest messages and the prompt that initiated the conversation.