The Email connector allows you to connect your own email provider via IMAP/SMTP and perform email operations directly in Siesta AI (agents, workflows, automation).
1. Adding an Email Connection
- Open the Connections section.
- Click on Add Connection.
- In the dialog, select the Email tile.
- Continue by clicking the Continue button.

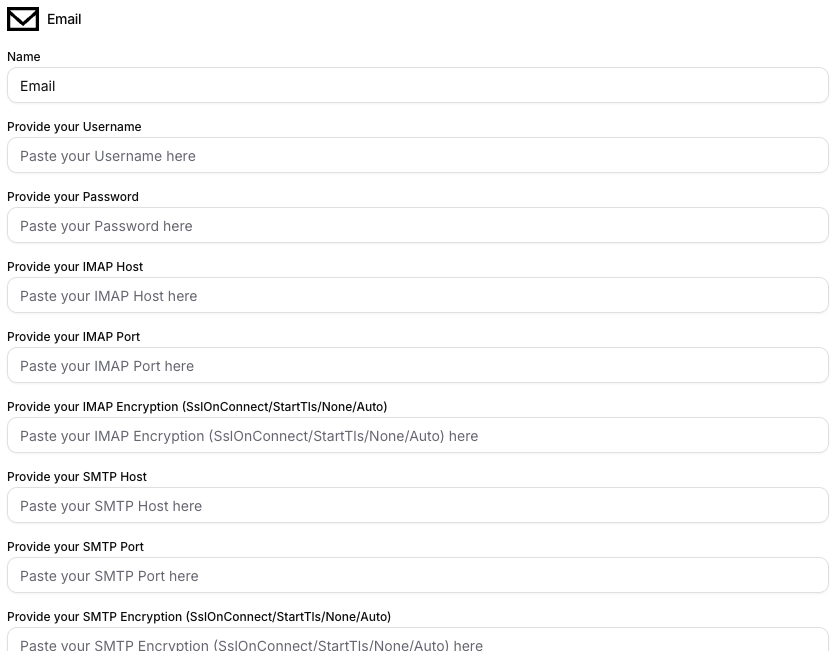
2. Configuring the Email Provider
After selecting the connector, fill in the configuration details:
- Name: internal name of the connection in Siesta AI.
- Provide your Username: login name for the mailbox.
- Provide your Password: password or app password.
- Provide your IMAP Host / IMAP Port: server and port for reading mail.
- Provide your IMAP Encryption: type of encryption (
SslOnConnect,StartTls,None,Auto). - Provide your SMTP Host / SMTP Port: server and port for sending mail.
- Provide your SMTP Encryption: type of encryption (
SslOnConnect,StartTls,None,Auto).
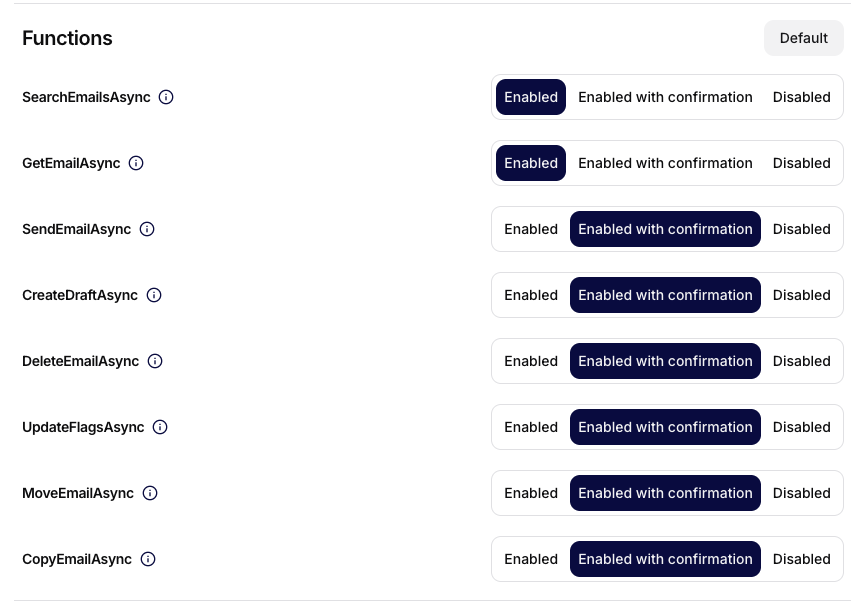
3. Scopes and Permissions for Functions
In the Functions section, you set the permissions for individual email actions (scopes/policies):
Enabled- the function is activated without further confirmation.Enabled with confirmation- confirmation is required before execution.Disabled- the function is disabled.
Typically, read operations are allowed directly (e.g., SearchEmailsAsync, GetEmailAsync), while riskier write operations run with confirmation (e.g., SendEmailAsync, DeleteEmailAsync, MoveEmailAsync).
4. Recommendations
- Use a separate service account or app password.
- Set the minimum necessary permissions for functions (principle of least privilege).
- For actions that modify data or send emails, prefer the
Enabled with confirmationmode. - Regularly review which functions are
Enabled.
Summary
The Email connector provides the ability to connect your own email provider via IMAP/SMTP, securely set scopes for individual functions, and control what actions agents and workflows can perform.