Set Roles, Teams, and Invites
Teams are the main access boundary for shared work. Use Users with roles to decide who belongs in the tenant and who can administer it, then use teams to scope agents, workflows, connections, Data, Memory, recordings, and task workspaces. Do not model teams only after the org chart; model them after operational access.
Step 2: Choose Roles Before People
Roles grant platform capabilities. Teams and resource access policies decide which shared resources those capabilities apply to. Assign permissions to roles rather than building one-off permission sets directly on individual users.
Open Users → Roles to review built-in and custom roles. Access to this tab and role management requires Assign roles (Users.ManageRoles).
Select any screenshot to open it at full resolution.
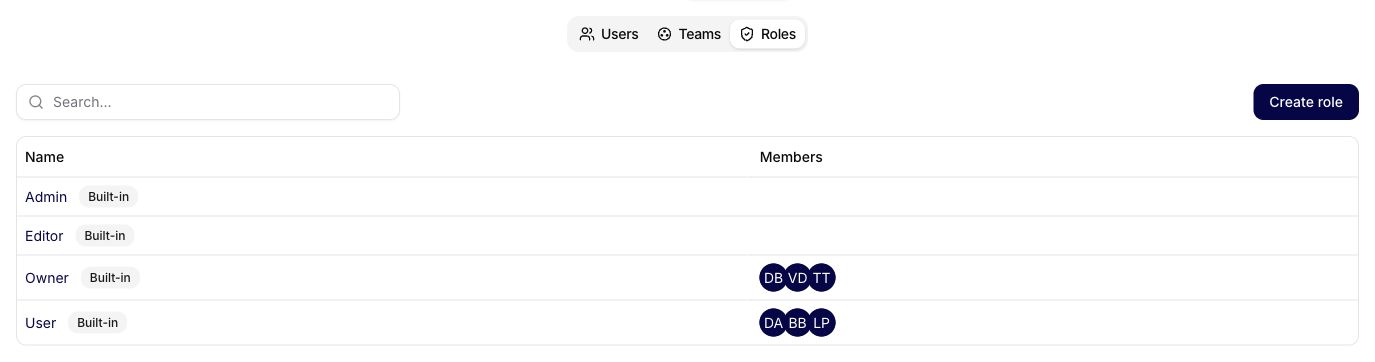
Built-in Roles
Siesta AI provides four built-in roles. The table describes their defaults; check the role detail for changes made in your organization.
| Role | Use for | Important boundary |
|---|---|---|
| Owner | Organization ownership and the highest-impact security or role decisions | Always has every permission and is read-only. Only another Owner can grant or remove Owner; the organization must retain at least one active Owner |
| Admin | Tenant operations such as users, teams, settings, security, reporting, and production governance | Does not receive Assign roles, billing management, or Entra team synchronization by default |
| Editor | Creating and editing agents, data sources, workflows, skills, and other governed resources | Includes resource sharing, but not user administration, organization settings, analytics, audit log, or API key management by default |
| User | Using approved resources, running normal work, and creating private connections where allowed | Does not receive agent or data-source creation permissions by default |
The deployed Users → Roles permission catalog is authoritative. Review the exact built-in defaults and dependencies in Roles and Permissions before approving a production role. Built-in roles cannot be renamed or deleted.
Review or Adjust Permissions
- Open a role and expand the permission groups for the work it should support. Use search to find a specific action.
- Select the required permissions. Selecting a child action also selects its required parent; removing a parent removes dependent actions.
- Select Save permissions. The change affects every member of the role.
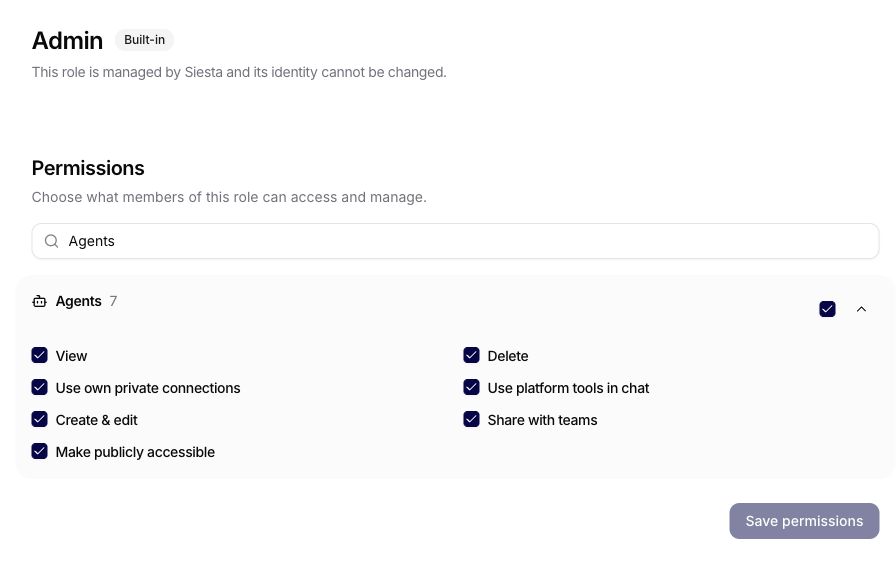
You can grant only permissions you hold yourself. Owner permissions cannot be edited, and a role with stronger permissions than yours is read-only to you. To update membership from the role detail, select the members and choose Save members.
Deployment policy can add another creation gate even when a role contains edit permissions. Confirm the deployed behavior in Who Can Create Agents before promising a self-service builder flow.
Custom role: Private Builder
Use a custom role when someone should create a private pilot agent and data collection without gaining the right to share them:
- In Users → Roles, select Create role and enter a unique Name, such as
Private Builder. - Under Agents, enable View and Create & edit. Leave Share with teams and Make publicly accessible disabled.
- Under Data sources, enable View and Create & edit. Leave Share with teams disabled.
- If the builder needs their own integration, enable View and Create & edit under Connections, but leave Share with teams and shared-default management disabled.
- Do not add user administration, role assignment, organization settings, security, billing, Admin mode, or organization reporting unless the job explicitly requires them.
- Select Create role, assign it to a test user, and verify creation, editing, and sharing in normal user mode.
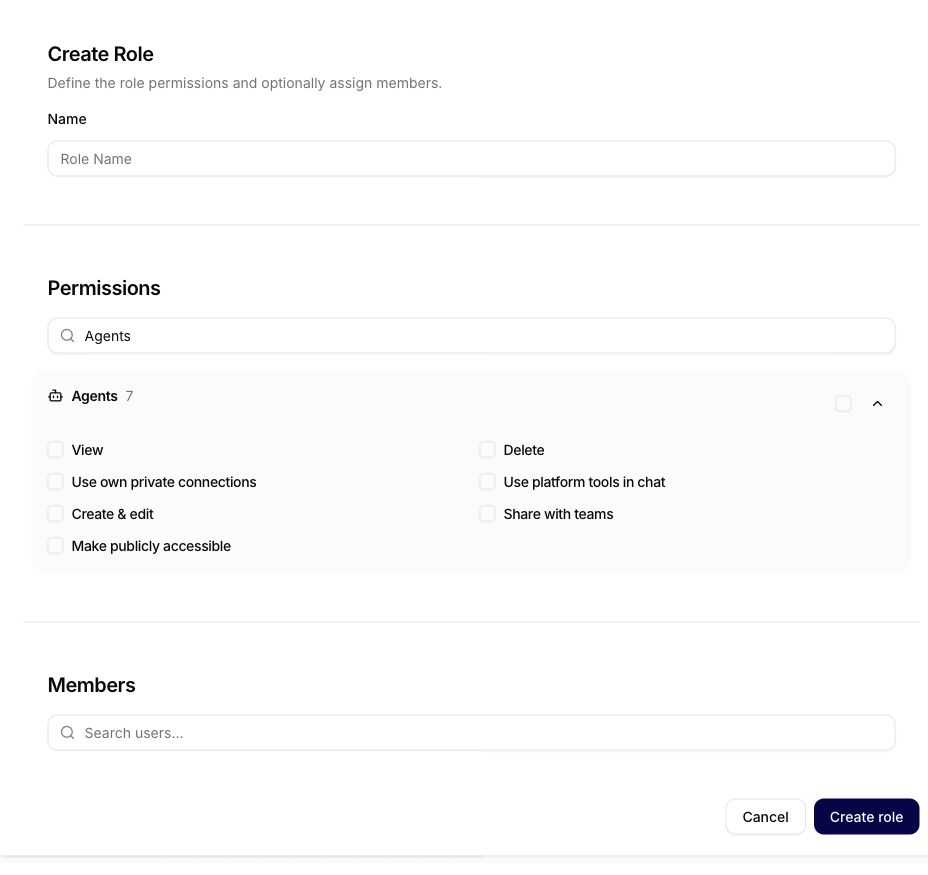
Permissions from multiple roles are additive. A second role that grants Manage Access / Share with teams defeats this boundary, so review every assigned role during the test.
If a person does not have Agents → Create & edit, keep the request workflow narrow: a permitted builder creates the private draft, the business owner approves its purpose and data, and only then is team Can Use or Can Edit access applied.
Step 3: Design Teams Around Risk
Good teams are small enough that every member can safely use the same production resources.
Examples:
Support - Production: can use the support agent, support data, Jira write actions with confirmation, and customer support workflows.Sales Ops - CRM: can use HubSpot and reporting agents, but not finance data.Finance - Reporting: can use finance data collections and read-only reporting workflows.Client A - Delivery: can access client-specific agents, data, and workflows.AI Admins: can edit production agents and review tool execution incidents.
Avoid a single shared team for everyone unless every person should see the same agents and tools.
A user can belong to more than one team. Use that intentionally when the person works across compatible access boundaries, and review the combined visibility before rollout.
Create A Team
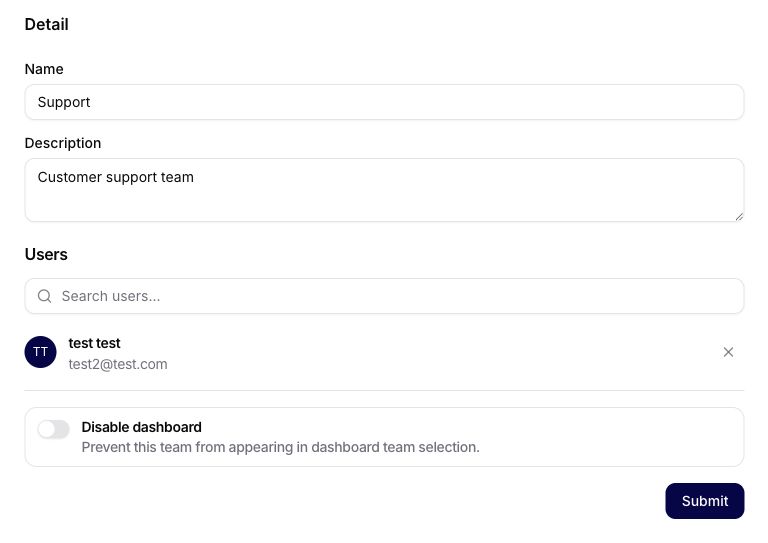
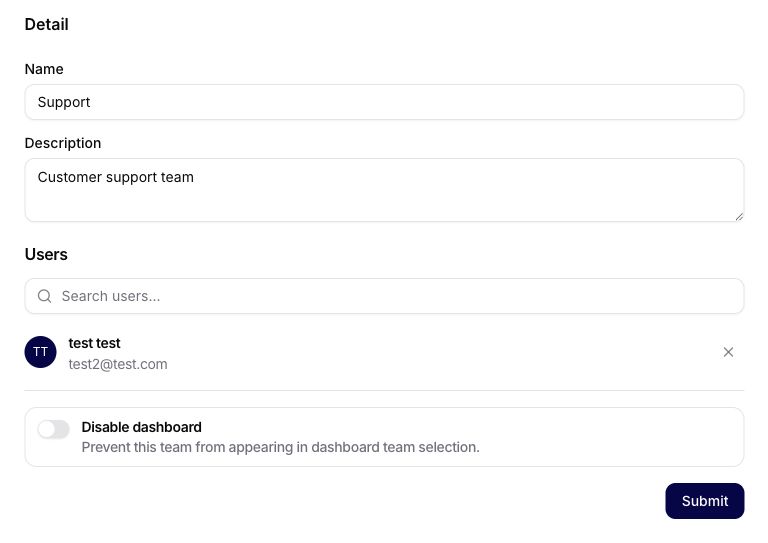
- Open Users → Teams. Creating and editing teams requires Create & edit (
Teams.Edit). - Click Add Team.
- Enter a clear Name and optional Description.
- Add users who need the same access boundary.
- Enable Disable dashboard only when this team should be hidden from the dashboard team selector. This does not remove membership or resource access.
- Select Submit, then use the team when sharing agents, workflows, connections, Memory, and data.
Use names that explain ownership and purpose. Support - Production is better than Team 1.
Step 4: Invite Users After Role and Team Decisions
Choose the onboarding method that fits how the organization manages identities. Keep detailed invitation, CSV, and account validation work in Users; use this page to connect identity setup to team access.
For a controlled invite-only pilot, disable Automatically create an account on first sign-in under Organization → Security → User Management before the first Microsoft Entra user signs in. When it is enabled, eligible users in the Entra tenant can receive an account without an invitation. Treat this as an explicit tenant policy, not a universal requirement.
| Method | Use when | Detailed instructions |
|---|---|---|
| Create User | An administrator should create an active account immediately. | Creating a new user |
| Invite User | The user should complete registration from an email invitation. | Inviting users |
| Import CSV | Several users should receive invitations in one batch. | Bulk invitation from CSV |
| Approved Domain / SSO | People with an approved company domain should join through configured Google or Microsoft SSO. | Domain-based onboarding |
| Microsoft Entra Sync | Organization groups and their membership are managed from Microsoft Entra ID. | Microsoft Entra synchronization |
Use this order for a controlled rollout:
-
Choose the onboarding policy. Decide whether the tenant is invite-only or allows automatic/domain-based onboarding, and whether accounts will be invited, imported, created, or provisioned through Entra.
-
Choose the least-privileged role. Use User for normal product use, Editor for the reviewed built-in authoring posture, or an approved custom role for narrower duties. Use Admin or Owner only for tenant-wide responsibilities.
-
Create the team boundary. Create the pilot team and define which agents, data, connections, and workflows it will eventually receive.
-
Create or invite the user. In Users, select Create User, Invite User, or Import CSV, or run the configured domain/Entra flow. A single invitation captures email, name, and an initial role.
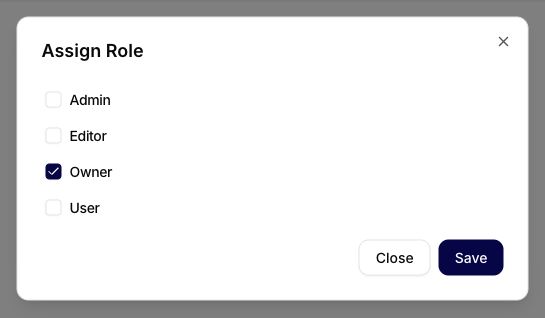
Once the account exists, a person with Assign roles can open its action menu and choose Assign Role. Select every role the user should keep, then choose Save. This replaces the complete assigned-role set: clearing a role removes it. Permissions from all selected roles are combined.

You cannot change your own roles. Only another Owner can add or remove Owner, and at least one active Owner must remain. Other role managers can assign only roles whose complete permission set they hold themselves.
-
Add the accepted account to its team. Open Users → Teams, edit the prepared team, add the user, and select Submit. Team membership is what connects the account to team-scoped agents, workflows, data, and other shared resources.
-
Verify resource visibility. Ask the user to sign in and confirm that the expected agents and other resources are visible, and that unrelated team resources are not.
-
Review onboarding completion. Check Pending Invitations. Resend an active pending invitation, refresh an expired or revoked invitation through the invite flow, and revoke an invitation that should no longer be usable.
Role policy → Team boundary → Invite → Verify access
Creating an account does not by itself grant access to team-scoped agents or data. The role controls broad platform capabilities; team membership and resource access policies control which shared work the user can reach.
The Users reference above covers invitation behavior, CSV import, approved domains, and pending invitations.
Offboarding Checklist
When a user leaves a team or organization:
- Remove the user from teams they no longer need.
- Reassign ownership of production agents, workflows, connections, and API keys.
- Delete or rotate credentials tied to that user's external accounts.
- Review private connections assigned to agents.
- Check Tool Executions for pending approvals owned by the user.
- Confirm SSO or Entra sync will not re-add the user.
Troubleshooting Access
If a user cannot see an agent, workflow, connection, or Memory collection:
- Confirm the user is in the correct organization.
- Check all assigned roles and their combined permissions. If Roles or Assign Role is missing, check Assign roles; the Admin role does not grant it by default.
- Confirm the team membership.
- Open the resource and check whether it is private, organization-wide, or shared to teams.
- Check whether the team has Can Use or Can Edit/Write access.
- Ask the user to refresh and remove filters before assuming the resource is missing.
Once the pilot membership is correct, configure the connections and token limits needed for its first agent.